20th Century

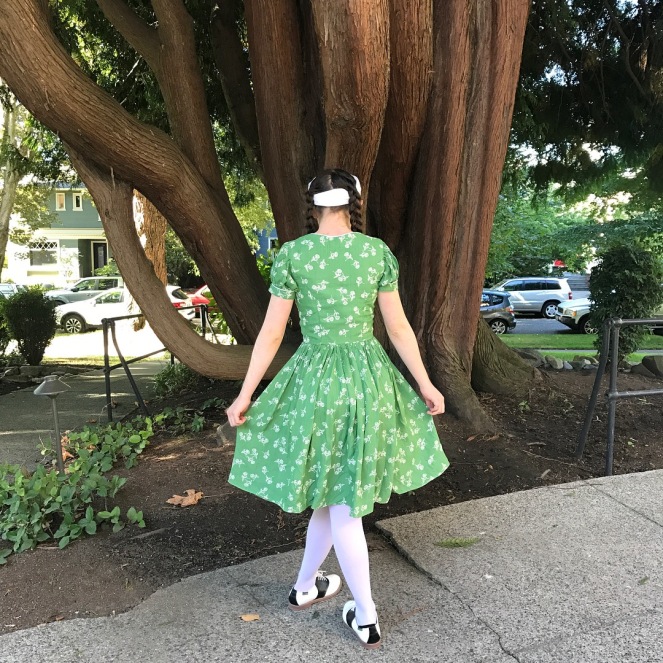
An Autumnal Dress, Circa 1940

I first discovered the beauty that is Butterick 1148 in Bianca’s lovely blog post.

1148

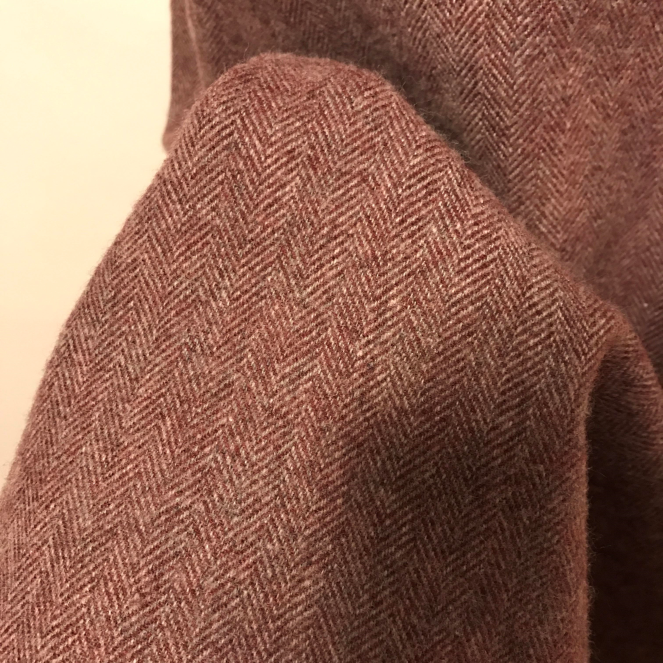
When I saw this illustration, I had been working on Maximilien Robespierre for a while and I was dreaming about what I would make after that costume was finished. Butterick 1148, hopefully in a madder orange wool crepe, was at the top of my list.

Of course, it took longer than expected to find the perfect wool crepe, and the dress itself took forever to make and even longer to photograph. However, it was 100% worth it.

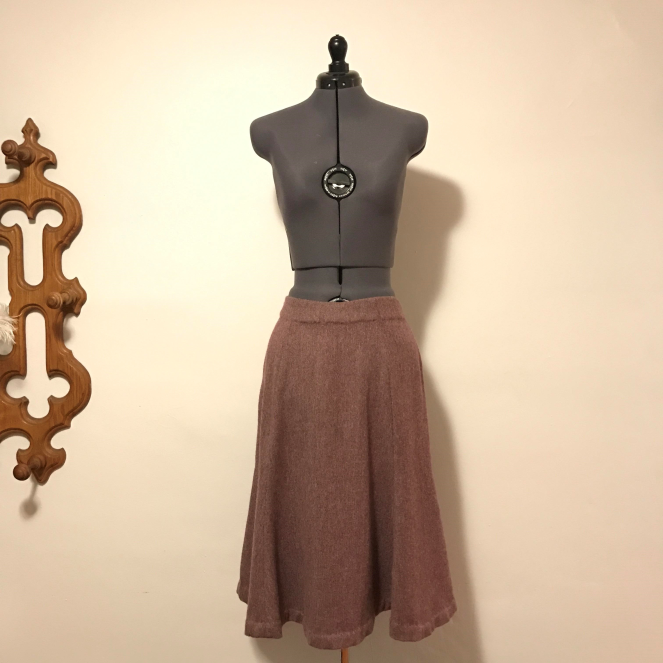
Because I knew that I likely would be unable to find the original pattern, I decided to draft the dress based on the illustration. I started by draping a pattern on my dress form. Once I had a basic pattern that fit, I started sewing. I didn’t document the construction very well with pictures, but I will describe the changes I made to the inspiration image. The main change was that I mistakenly made the skirt a bit narrower. I also omitted the ruffles at the hips in favor of bows, and I added bows to the sleeves. Lastly, I changed the shaping in the underbust from five tucks like the illustration to three little darts.

My aunt and uncle gave me the most lovely little deco buttons, so I decided to utilize these too, even if they were a bit dirty from an unknown number of years in a button box.

IMG_1050


IMG_0895
This is the one construction photo I have. This seems like as good a place as any to put it.

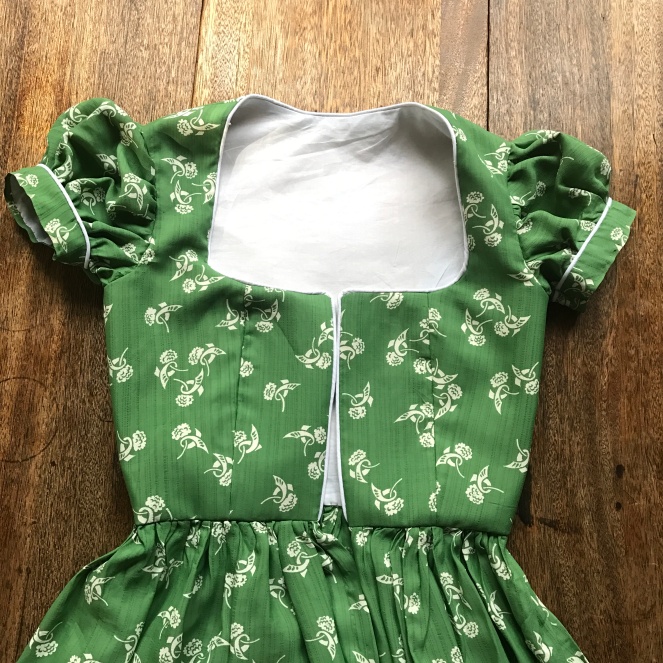
I won’t describe the construction because a lack of photos would make that dry. Nevertheless, there are a few things that should be noted. The main reason that this dress took so long was that I was determined to make it neatly finished inside and out. This was made difficult because of the fray-ey nature of wool crepe. So, I decided to cover every single seam in lace seam covering. The neckline facings were finished too. I also decided to forgo hand-worked buttonholes (I’d had more than enough after Robespierre), so the bodice fastens with snaps. Lastly, when I was planning this dress, I’d apparently declared war on zippers (I dislike inserting them). My alternative, however, was likely more difficult. I chose to have a side closure that operated with hook and eye tape. It works; it’s just a bit odd. At least I had hook and eye tape and was able to avoid sewing in each individual hook and eye.

I also made a little heart-shaped hat to go with this dress! I found a ’30s illustration on Pinterest that depicted what was essentially a heart-shaped pillbox hat, so I decided to make one for myself. The hat serves to match the shoes that I like to wear with this dress (my Lillian heels by Royal Vintage, which are some of the best shoes I’ve ever worn) and tie the look together.

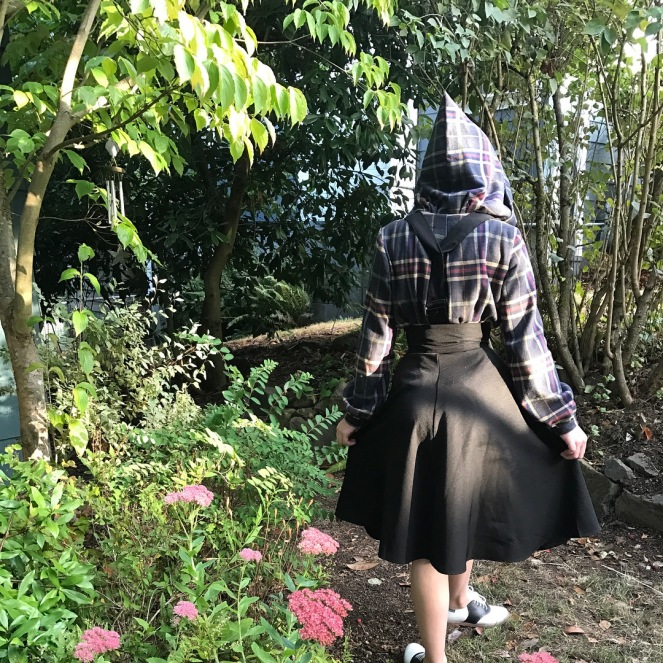
Anyway, on to pictures!

IMG_2140IMG_2141IMG_2142IMG_2143IMG_2144IMG_2145

Now, for some more glamourous shots with (hopefully) better lighting:

IMG_1603IMG_1604

IMG_1877IMG_1879

All in all, I’m really happy with this dress. I’m also glad that I managed to finally blog about it! I actually finished construction in January…

Thanks for reading!


20th Century

Vintage Sewing, Fall of 2017: Part II

This is the second half of my most recent post, which can be read here. As I said there, I’ve been sewing a lot this fall, so I thought that I’d finally document what I’ve made. I’ll also include the pictures that I (finally!) got of a project from a while ago.

After making the striped dress from a pattern from 1946, I worked on my Halloween costume for most of September. However, in late September, I attended the Snohomish Tweed Ride, and I determined that I needed an outfit. I had the proper jacket, shirt, shoes, etc., so I chose to make a new skirt from Simplicity 8486. I used a wool twill in grey and maroon that I found at a garage sale, and I altered the pattern a bit so that the front and back panels were wider at the hem (to make it easier to ride a bicycle). The skirt went together quickly, and only got caught in my bike chain once!

skirt fabric
This doesn’t show the color very well, but the texture is spot-on.

untitled


IMG_0324
The tweed ride included a bring-your-own-cup tea party at the end.


The next thing I made was a quick dress from Gertie’s Ultimate Dress Book. (Side note: I love her books, and I always reference them when I’m trying to learn a new technique, because she has some great dressmaking information!)

I wanted a vintage-inspired dress for the Northwest Tea Festival, and I had about two yards of Ikea fabric in a tea and accoutrements print, so I was able to Frankenstein a dress together using the V-neck bodice from Gertie’s books and some mysterious circle-ish skirt pattern that I’d drafted a while ago. I cut it out one night, and then spent 5 hours sewing the next night (which was luckily a Friday) and I was able to wear it on Saturday! The fit on this is a little off (it’s a bit too tight and too high in the waist), but it was fun to wear nonetheless. I was going to add some ribbon decoration around the waist and neckline to hide the fact that the facing tends to peek up because it warped (it was cut on the bias), but I also like the dress as it is. If you have any strong opinions or great ideas for what I should use to trim it/if I should trim it, please comment.

Regardless of if I add to it, it was wearable for the tea festival, and I greatly enjoyed wearing it. The belt here is not connected to the dress, I just liked how it looked.

IMG_0437

IMG_0425

The last thing I have to write about is the pictures I took of my “Rosie the Riveter” Dress. I have an entire post devoted to it, so I won’t discuss construction here.

Here are the photos:

IMG_9913

IMG_9918


IMG_9923
Naturally, I had to do the classic Rosie pose (also, my eyes always squint when I smile)


That’s all for now. Thank you for reading, and keep your eye out for a post about my Halloween costume soon!

20th Century

Vintage Sewing, Fall of 2017: Part I

Since August, I’ve been gradually adding to my vintage-inspired clothing “stash,” for lack of a better word. It has mostly been clothes for school, which started in late August for me, but also two garments for events. Because there is a lot to cover here (I made 5 garments!), I’m going to do two posts. Hopefully, the second one will be out by the end of the weekend.

Unrelated: I’ve been doing a lot of historical sewing as well lately, but I’ll discuss that in a series of later posts, so keep your eye out.

The first thing I made was a dirndl dress from Gertie’s Butterick collection, pattern B6352. This dress originally had a zipper down the front, a gathered circle skirt, and a ruffle around the bottom of the skirt, but I only had 4 yards of rayon (the pattern called for 5 or 6 yards) and I dislike zippers, so I made some alterations to the pattern.

Before I discuss those alterations, allow me to digress about this fabric: it’s lovely. I bought it from the Etsy shop The Vintage Nerd Sews, and the proprietress of the shop was very helpful when I asked about the fabric. The fabric itself is a green rayon with irregular ridges, almost like dupioni. It was exactly what I had in mind when I was searching, so thankfully I was able to buy it for this.

Anyway, those aforementioned alterations consisted of using hook and eye tape for the front closure, gathering a rectangle for the skirt, and omitting the ruffle. I was able to cut the skirt on the selvage edge, so I didn’t have to think about hemming, which was a relief.

The construction was rather complicated, because I flat lined the bodice with heavy canvas to compensate for the rayon’s slippery nature. I also fully lined the bodice, and finished every seam. The neckline and cap sleeve cuffs were piped with white piping, and a lot of the finishing was done by hand to ensure neatness.

I still need to add a modesty panel into this, but I’m debating doing that because I would just use a piece of white fabric, and it’s easier to wear a white tank top. We shall see.

Here are some construction pictures:

IMG_0014
Here it is in rough form, before I added the piping
IMG_0101
At this point, it was finished, save for hooks and eyes. One can vaguely see the bias tape lining I hand sewed into the sleeve cuffs, which is honestly one of my favorite parts of this dress because it feel so neat and tidy.

For some reason, I had such a hard time photographing this dress when worn, because I would forget to ask a friend to photograph it at school, or I would feel awkward getting photos on the school grounds, or the photos would be blurry, so even though I wore it as much as I could before the weather became too cold, my photos are sub-par. The best ones were taken in the window of my school’s costume closet by a friend.

IMG_0620
I forgot to take off my cardigan for this one; sorry!
IMG_0623
I don’t know what I’m doing in this one (one asks oneself “Why is she smiling at the exit sign?” and one does not have an answer)
IMG_0414
This was taken on a different day

The next thing I made was a hooded flannel from the Simplicity 8447 pattern. The pattern is great, and I cannot wait to make the overalls and the pants, but the hooded flannel captured my heart as soon as I saw it, and I had to make one. In fact, I’m trying to start a hooded flannel revolution among my peers because they’re so comfortable and chic, and one of my friends has made one thus far. Another has the pattern at the moment, and when I get it back, I plan on making several to give as gifts and for myself. The pattern is simply that amazing.

Anyway, on to construction: Using a cotton flannel from Joann’s, I followed the pattern for the most part, making up my own instructions where I thought Simplicity’s were unnecessarily complicated. I finished almost all of the seams, with the exception of the armscyes, but I may neaten those by hand if fraying becomes a problem. I also tacked down all of the facings by hand for a clean finish.

Here are some pictures, in which I was also wearing a high-waisted skirt, because I like how it makes the shirt more fitted.

IMG_0321
Excuse my messy yard
IMG_0320
The hood was the best part

The next thing I made was from a vintage pattern, Hollywood 1938, which was printed in 1946. The instructions were rather unclear, so I mostly made them up as I went along, which worked out very well.

Before making my dress, I made a mockup because I wanted a perfect fit, and luckily, the pattern fit me perfectly, without any alteration, which is unusual for me because I have a long waist. Once I was certain it fit, I used a plain, if a bit sheer, striped cotton from a local fabric store, Drygoods Design, for the dress, and I decided against trimming it because I liked the simplicity of the blue-grey stripes. I especially like the pockets, which fit my phone and gloves perfectly, because of the contrast in the stripe direction. I was running out of interfacing as I made this, so the interfacing on the neck and back facing is very spotty, but it works. I finished all of the facings, and tacked them down by hand, and after that, I added buttons.

I wear this over a 1940s cotton slip, because the fabric is fairly sheer, which has inspired me to make myself more slips, because they’re so pretty and because I have an original pattern from the early 1940s. Hopefully, those dreams will come to fruition soon.

I’m also wearing a black belt to define the waist, because the princess seams do not to that very much on their own.

Here are the pictures:

IMG_0157
In this, I’m holding my new favorite food, tomato ice cream

IMG_0280

IMG_0279

That’s the end of Part I! Thanks for reading, and keep and eye out for another post very soon.