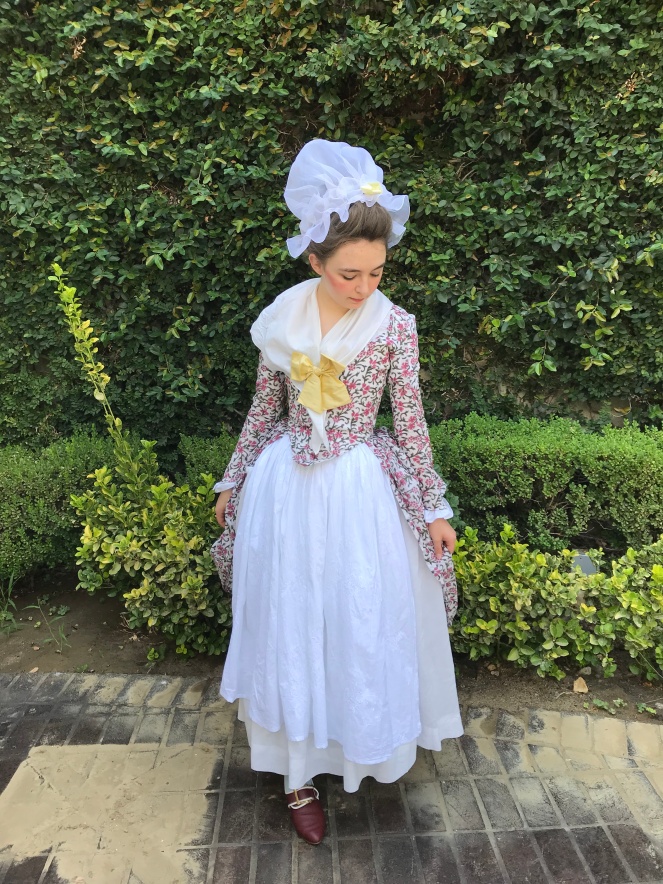
At Costume College this year, I was able to debut one of my favorite gowns: my floral “Italian gown.” Previous construction posts about this gown can be seen here and here. However, at Costume College, I noticed that the gown was too small in the front for comfort. Therefore, the next time I wore it, I decided to add in a small extension to the front. A similar technique seems to have been used on this dress at the Victoria and Albert Museum, but that alteration may have been made by a Victorian lady attending a costume party (I have no way of knowing because I have not seen the dress in person nor do I know how the alteration was made).
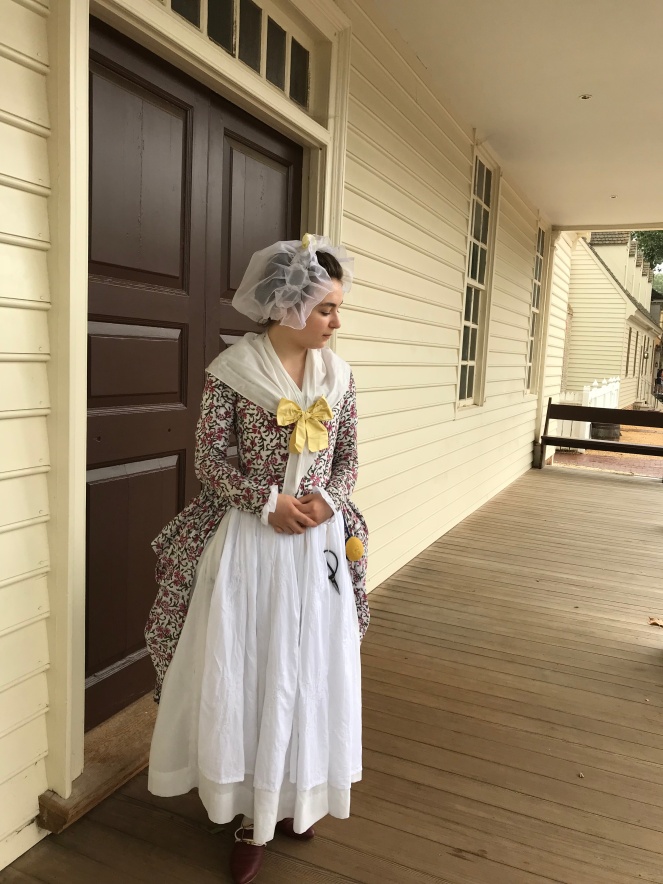
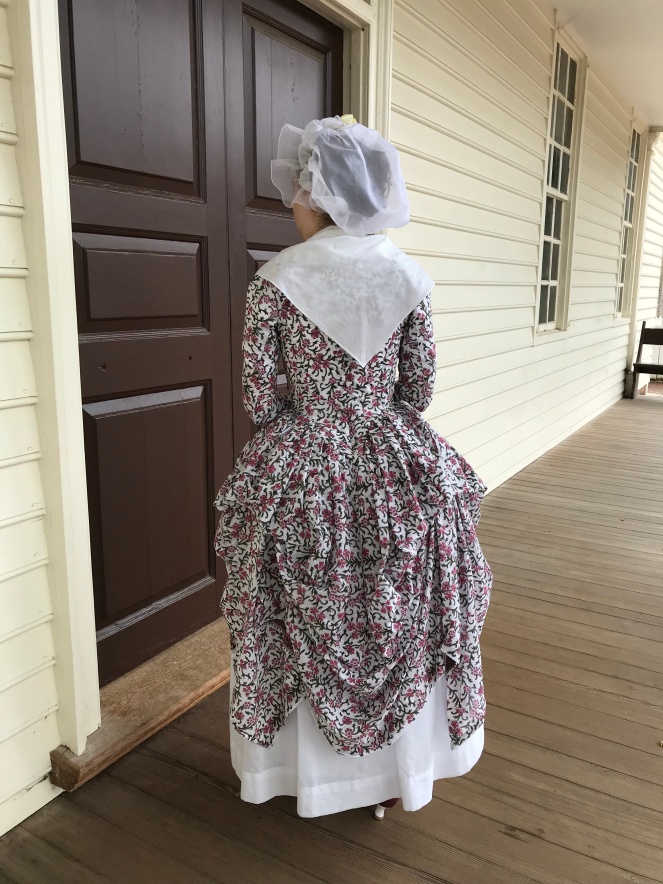
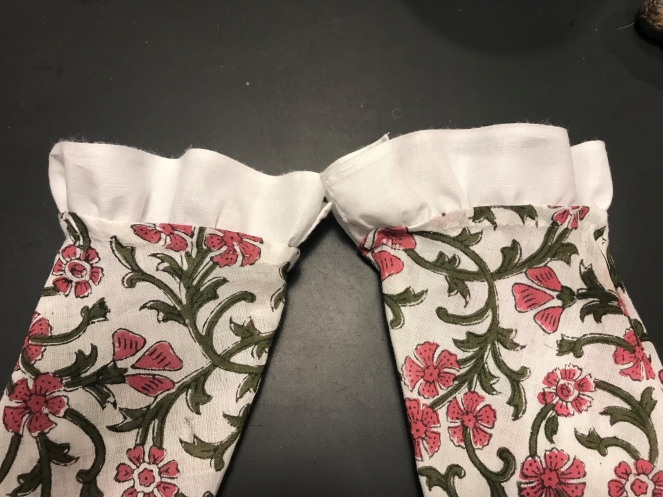
Here are a few pictures of the dress before the alteration, worn at Costume College with my favorite cap, about which I’ll maybe blog someday:
As you may be able to see, the front was too small, so it pulled up at the bottom.
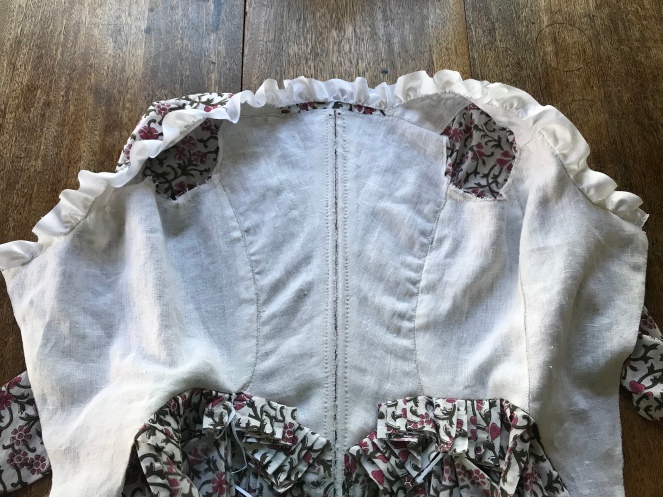
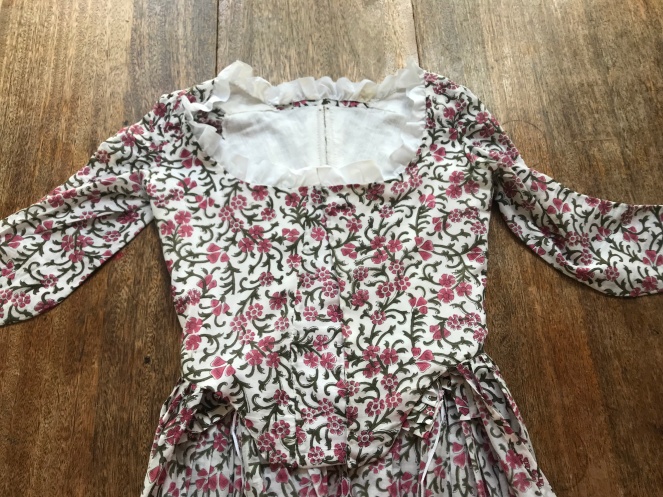
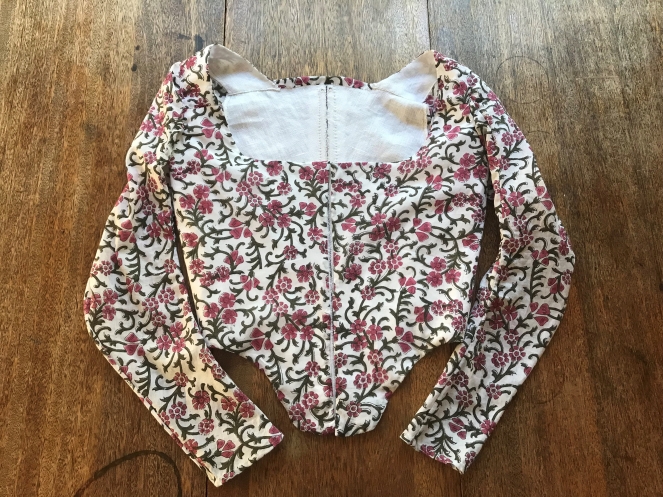
Here is the dress, before being altered:
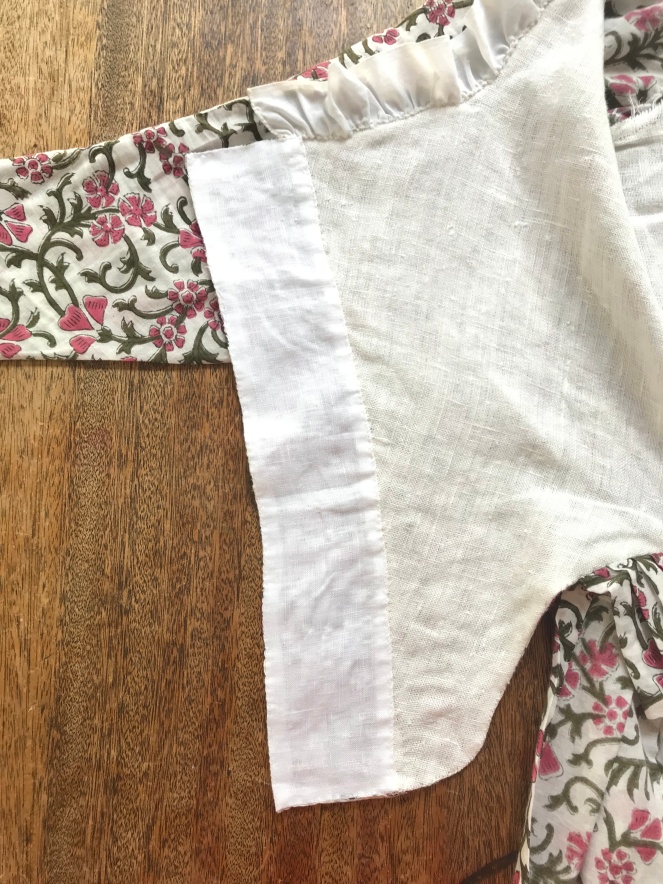
I brought this dress to wear while in Williamsburg, so the night before wearing it, I tacked a rectangle of linen to the center front of the bodice at the right side. Then, I covered this rectangle of linen with a scrap of cotton, hiding all raw edges. Piecing is period! However, next time I do this, I will probably add a bit of fabric to both sides of the bodice, which appears to be the technique used in the V&A gown I linked above.
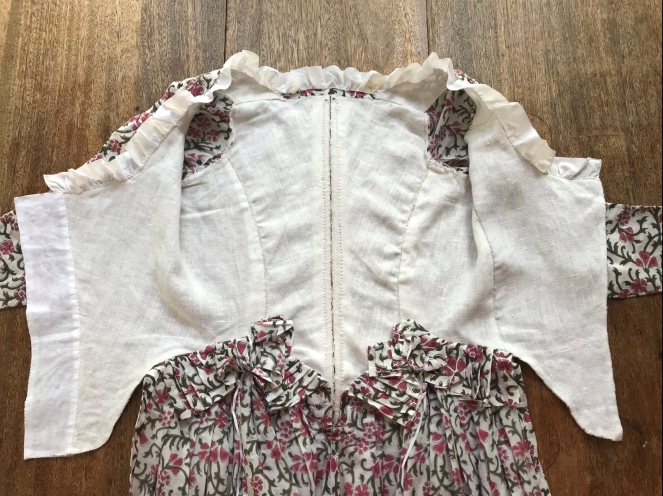
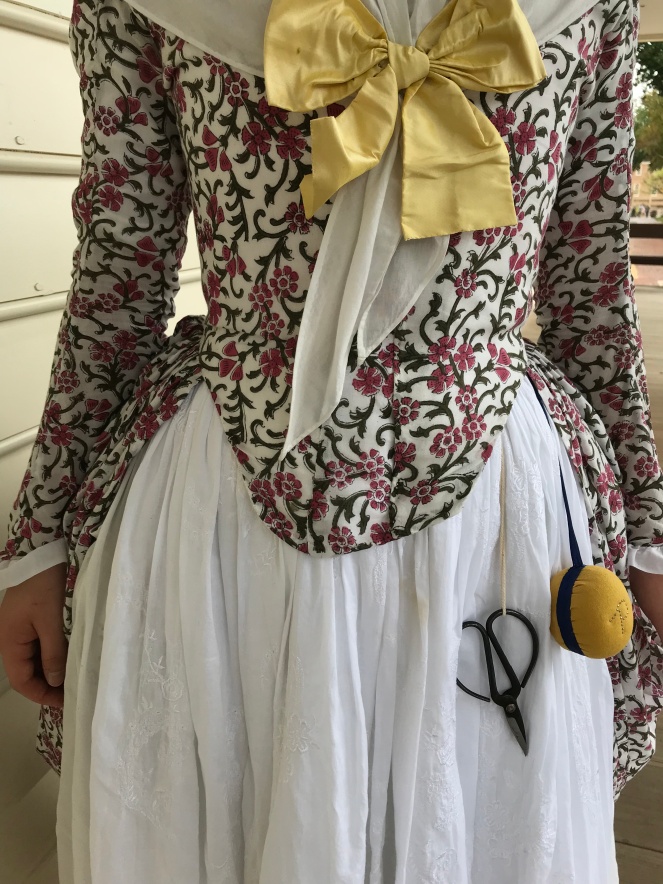
Here are some pictures of the bodice with its alteration:
The best part about this fabric is that one can hardly see the piecing because the pattern is so busy.
The alteration worked wonderfully in Williamsburg, but somehow my pinning got off kilter, so these pictures make the front of the dress look more uneven than it is. My silk gauze cap also melted a little bit in the rain, but it’s nothing a little starch won’t fix.
Thank you for reading! Hopefully, I’ll find some time to blog about Colonial Williamsburg soon, too. I have many pictures!
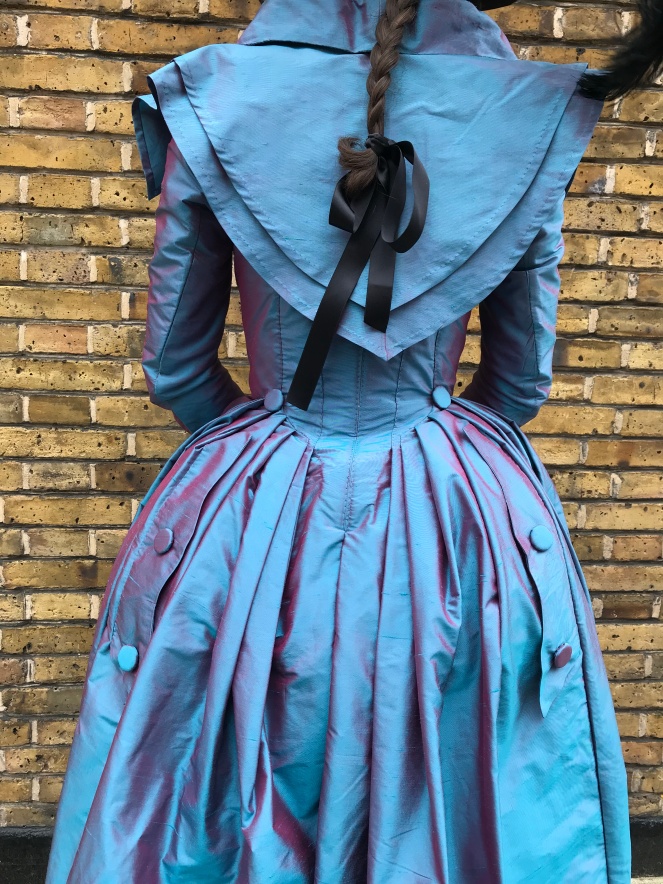
Recently, I found out about an Alice in Wonderland cosplay tea party at a tea house near where I live. So, I decided to create what I pictured Lewis Carroll’s Alice wearing had her story been set in the 1770s: a blue linen round gown, a white pinner apron, and a white cap and kerchief. Sadly, the date of the tea was moved and I was not aware, but I already had completed most of my round gown, so I decided to finish the project, regardless that I no longer had an excuse to dress like 1770s Alice.
The pattern for this dress was almost exactly the same as that of my “Maureen gown,” except that I made the sleeves slightly tighter and the front panel larger. It’s also a round gown, so its skirts are different, but I’ll get into that later.
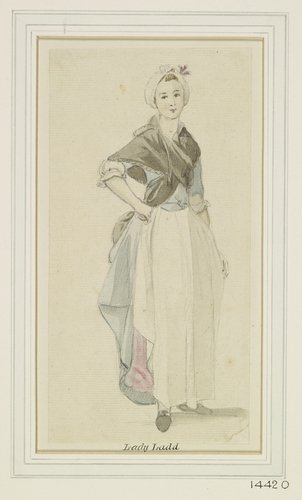
My main inspiration for this came from these two watercolors, dated between 1760 and 1780, by Paul Sandby:
This dress was hand sewn with white linen thread from Burnley and Trowbridge. The fabric is white linen from Dharma Trading (I use enough linen that I buy it in bulk from them). The lining is their white linen without dye, but for the fashion fabric, I dyed 7+ yards of fabric to be a shade of periwinkle blue. (I dyed more than I needed because I determined that I could use blue linen for other projects as well).
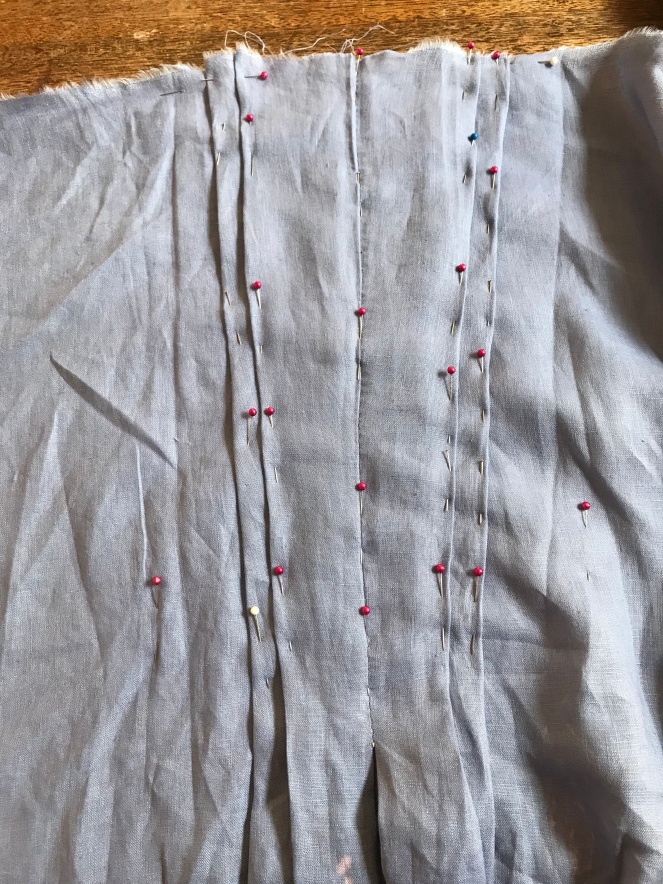
My first task was to assemble the back. I stitched the back lining together, and then began the pleating of the back fashion fabric. First, I made a diagonal seam at the center back of the blue linen.
Then, I pleated the back so that it had even and nice-looking pleats.
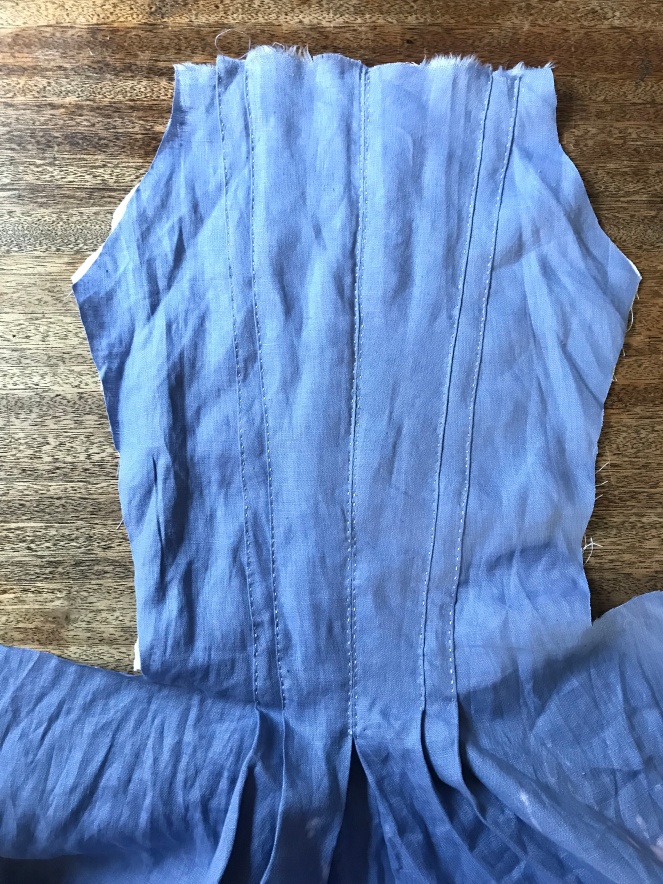
Lastly, I stitched these pleats down with spaced back stitches.
Next, it was time for what I consider to be the most difficult part of a dress with the skirts cut in one with the back bodice: pleating the side back skirts.
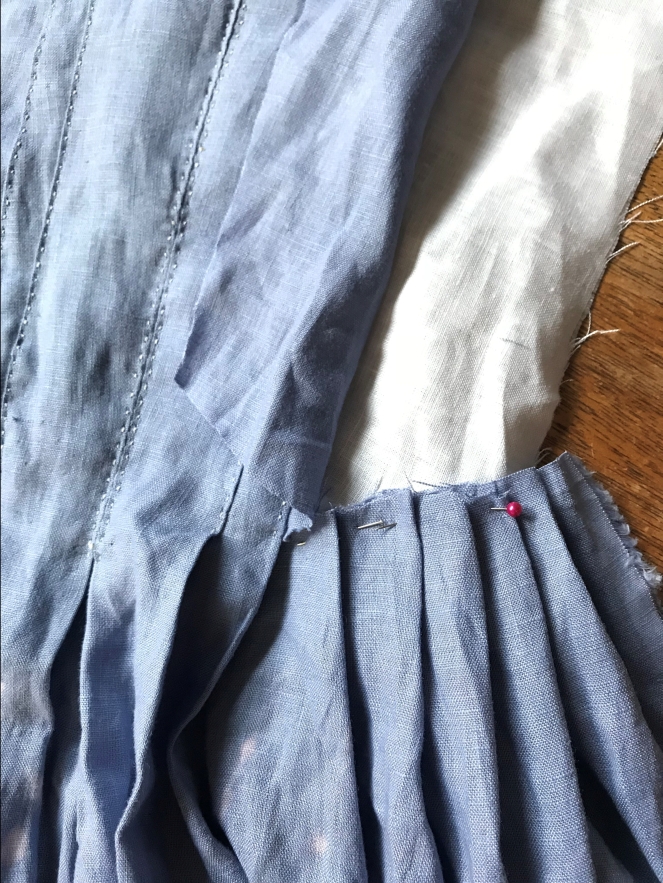
The first (and scariest) part is cutting the bodice from the skirts up to the point of the sewn down back pleats. Then, the side backs of the skirts are pleated.
These pleats were stitched down to the linen lining. Then, I turned under the side backs of the bodice and whip stitched it over the pleats.
Next, I attached the front bodice lining, front bodice, and shoulder straps.
Attaching the front bodice with spaced back stitches
Once I fitted the shoulder straps, I made and added the sleeves. The sleeves on this gown are different from my other 18th century gowns thus far in that I stitched horizontal darts at the elbow so that they have a bit more bend and in that I stitched the pleats in the sleeve heads down, almost like top stitched darts. That probably doesn’t make any sense without pictures, so I’ll try to take some pictures of the sleeves specifically next time I wear this dress.
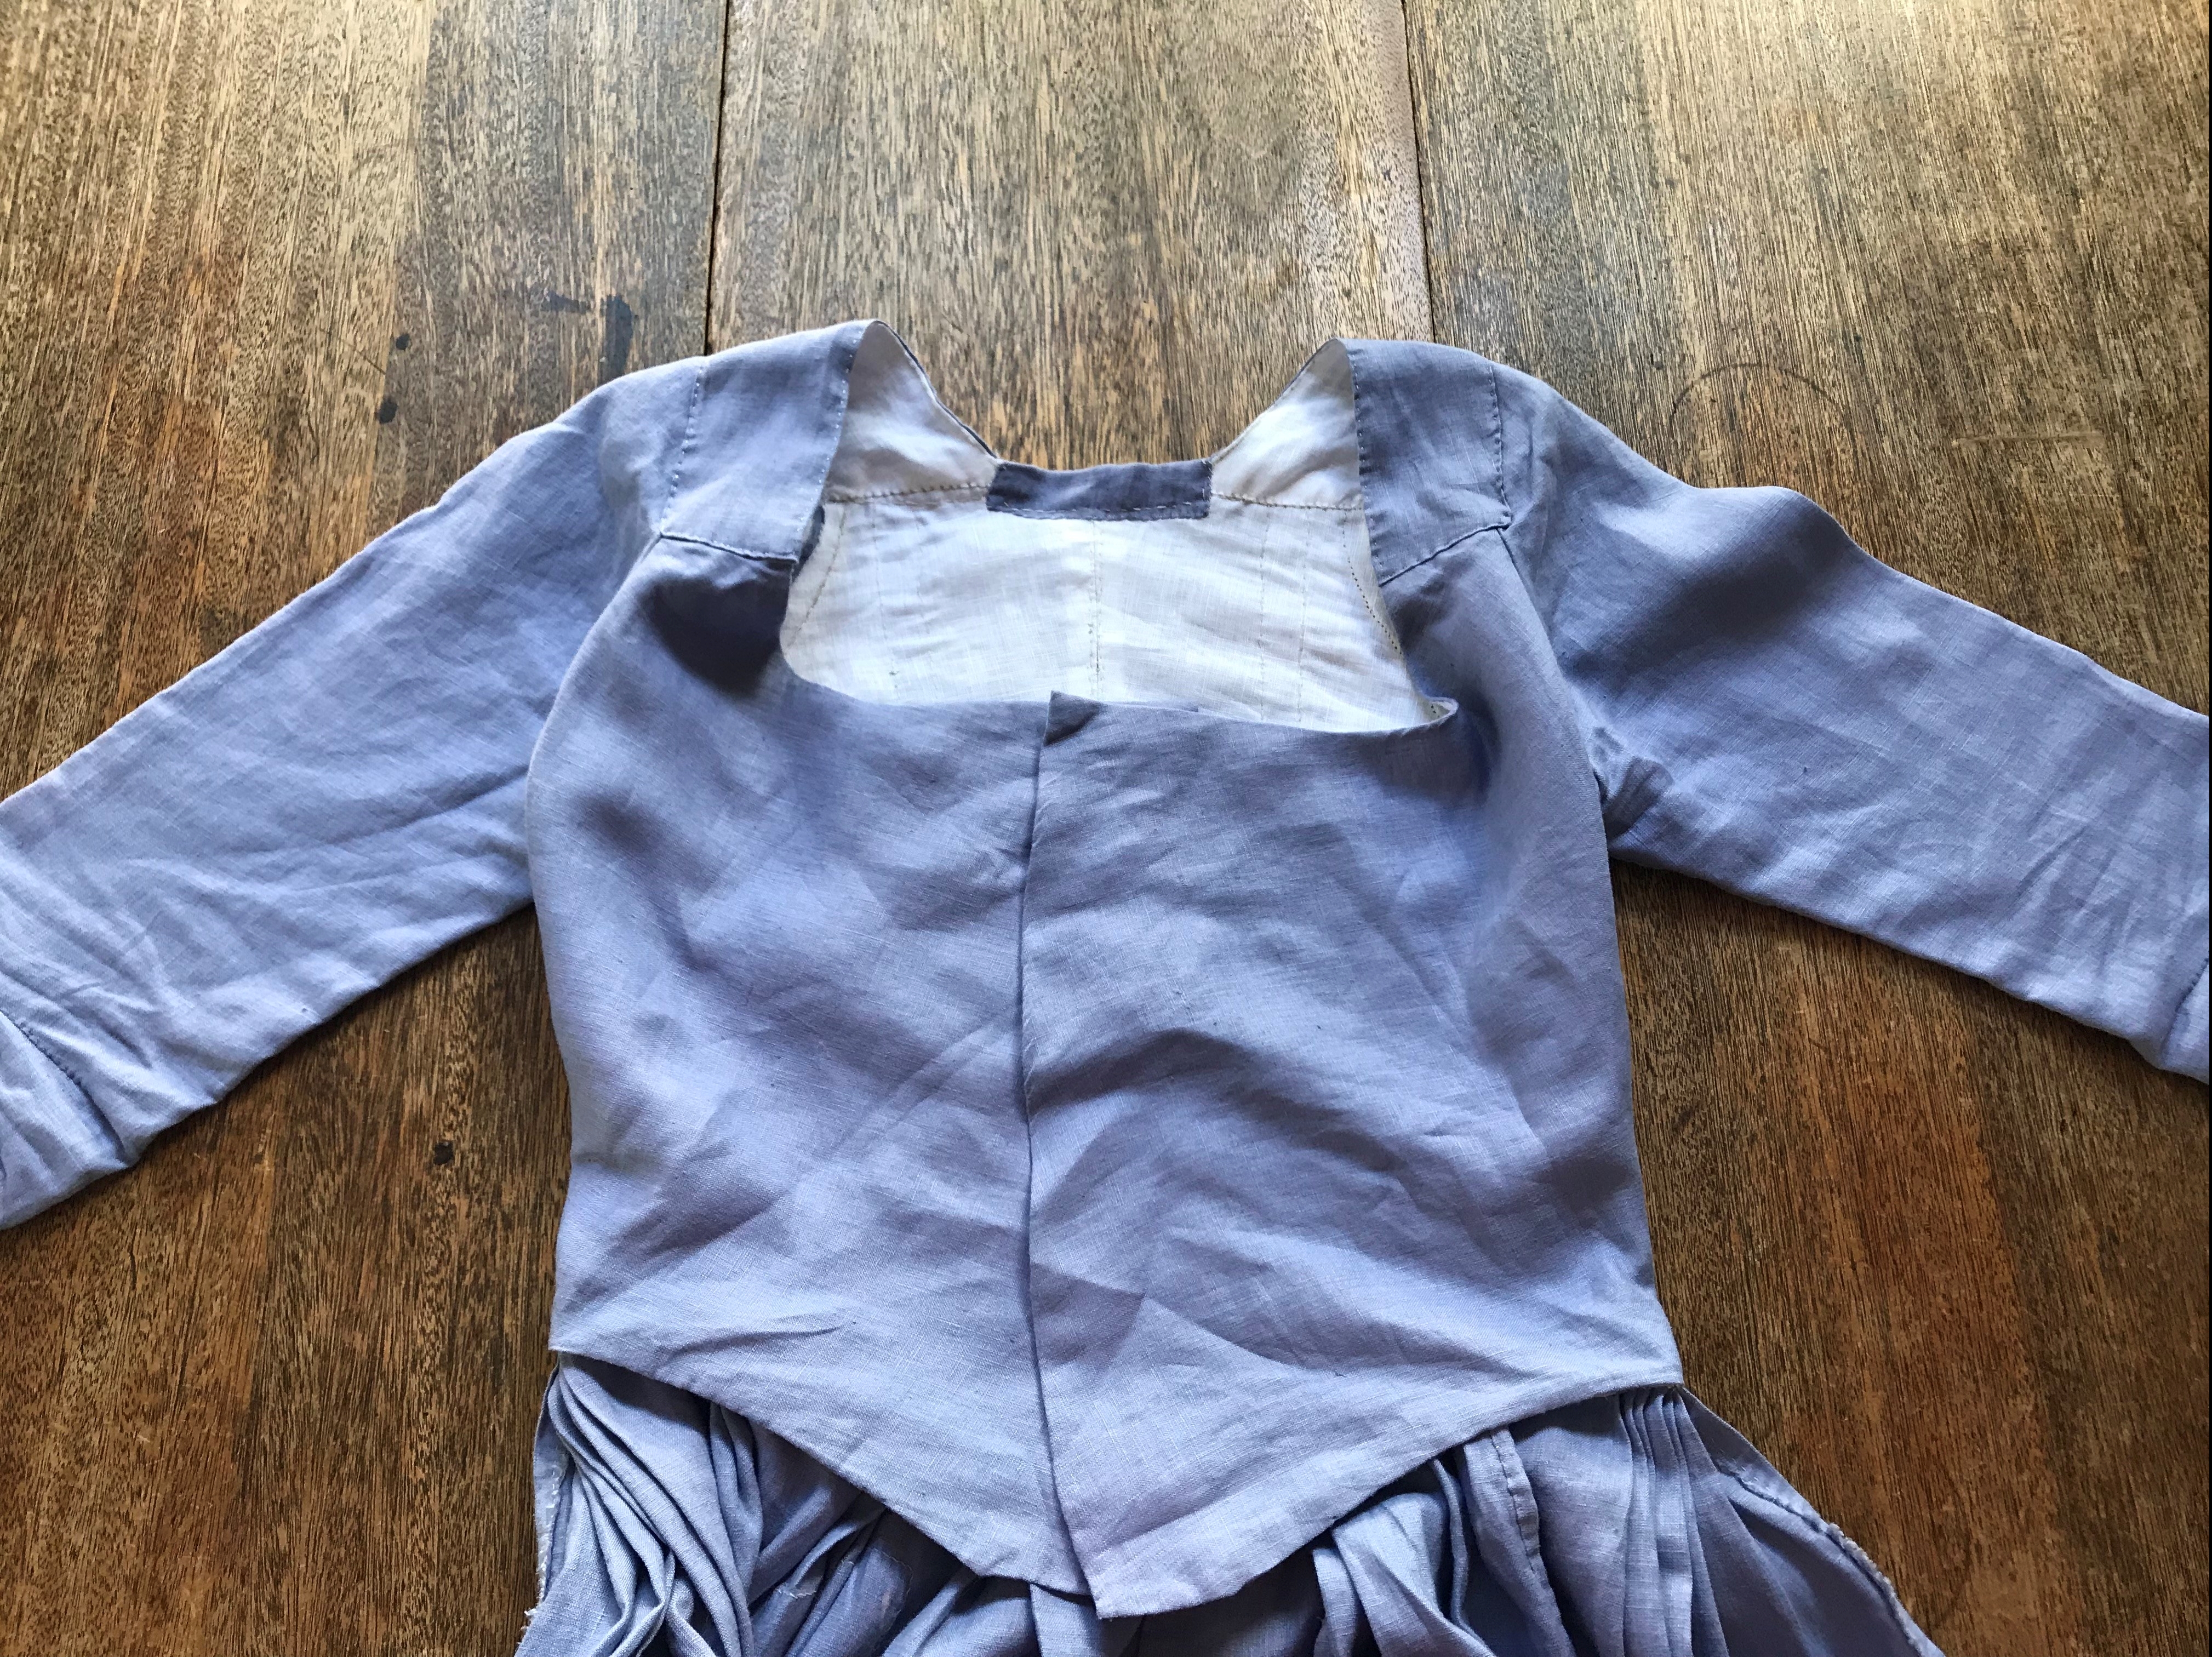
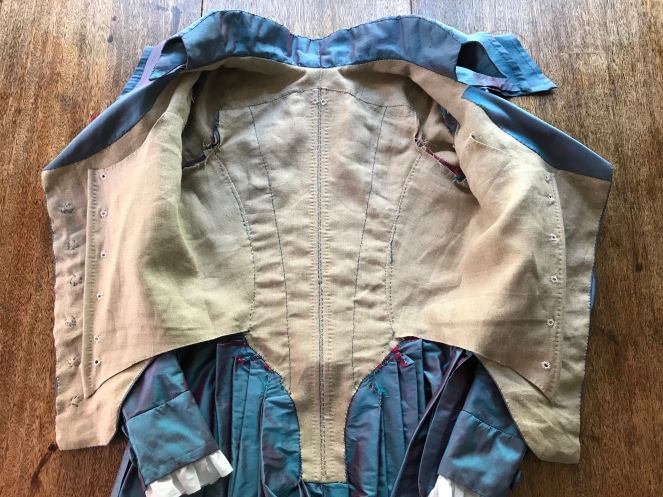
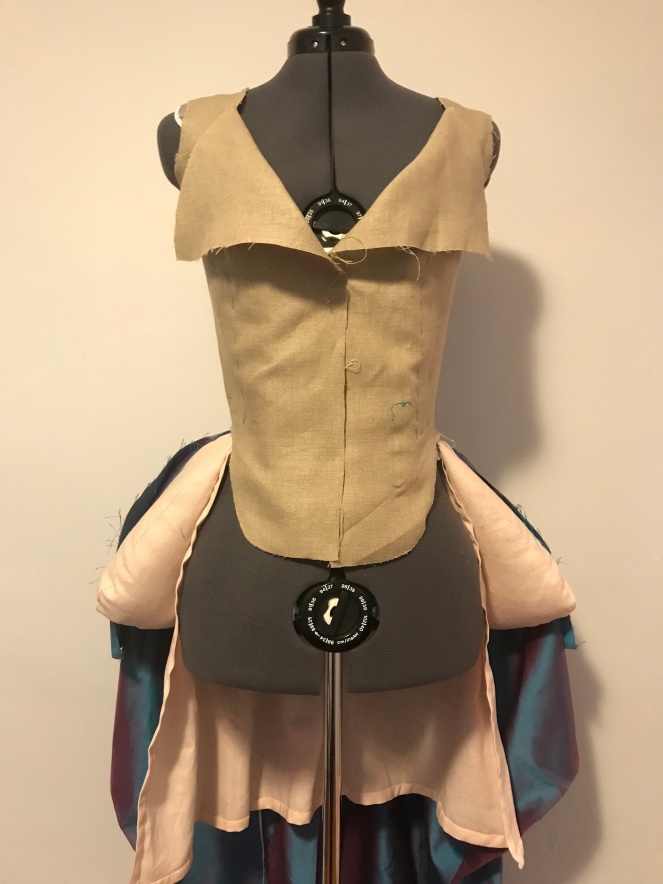
I also finished the front of the bodice almost all the way around, except for the three or so inches closest to the back of the bodice (where I still had to insert more skirt fabric). That was the state of affairs when these pictures were taken:
Next, I added fashion fabric to the top of the shoulder straps and I added a piece of fabric covering the top of the back of the bodice. These were stitched down with spaced back stitches.
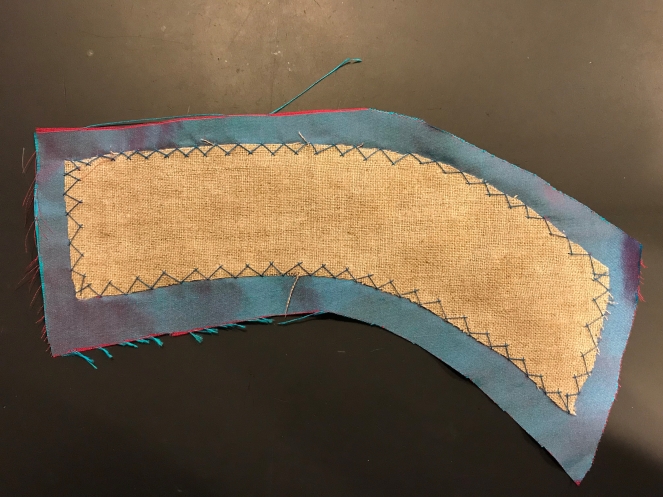
It was at this point that I decided that the little splotches and stains across the fabric were untenable. You see, when I had dyed the fabric, I think that there was still a little bit of bleach in the washing machine from the last time it had been used, which just so happened to have been the day we bleached the towels. I had tried to convince myself that the dress was just fine as it was and that stains would be accurate for this dress (I wanted it to be a lower class dress), but upon staring at the stains for a while, I realized that they made the dress look sloppy rather than lived-in. So, I went about the rather time-consuming process of covering each stain with a small patch.
I also covered each stain on what would become the front skirt panels with small patches.
Once that task was completed, I turned my attention to the front skirt panels. A half-width of the linen (about 27 inches) was mantua-makers’ seamed to the back skirt panel of the skirts and then pleated into each of the sides of the front of the bodice that I’d left open when finishing the bodice. Then, I added a full width of fabric to the side panels of the skirt, leaving the top few inches open and finishing these as pocket slits. This front skirt panel was pleated down to a twill band which can be tied around the waist. Lastly, I hemmed the dress, completing this project.
The front of the skirts is on a twill band, which you can see here. This twill band is tied around the waist and then the front of the dress is fastened over top.Lots of patches!
Overall, I’m quite pleased with this dress. I wore it on my first day visiting Williamsburg (about which I’ll blog soon), and it was quite comfortable. I made the front of the bodice very wide, so it’s highly adjustable, which is nice because it means that I have a gown that can be worn by my friends more easily. This is also slightly problematic though, because the center front closure is more angled than I’d prefer. Hopefully, I’ll complete my pinner apron soon though, which I think will look quite nice with this dress and cover the oddly angled center front closure.
My first coat for my recreation of the 1790 portrait of Robespierre was, to put it delicately, less than ideal. The collar fell down, the lapels were too low, the back of the coat didn’t have a vent, and the entire thing was thoroughly uncomfortable because it fit poorly in the shoulders. Therefore, for Costume College 2018 (post forthcoming soon) I decided to make an entirely new coat, with which I am much happier.
I started by changing my fabric. I didn’t have enough of my original taffeta left to make a new coat from the same cloth, so I ordered 3 or 4 yards of corduroy from Wm. Booth, Draper, but in brown and orange (which I don’t think they carry anymore). I had searched for striped silk taffeta in the proper colors to recreate the jacket, but I was unable to find it available online, so I settled for corduroy. I’m unsure that corduroy was used for coats in the late 18th century (it was used for breeches and waistcoats, apparently), but the colors were right. However, I may once more remake my coat once I find the perfect taffeta (which I have discovered to be available in the LA garment district and at Renaissance Fabrics and probably in the NYC garment district), but I’ll save hopefully-not-hypothetical Take III for a different post.
Once I had my new fabric, I sliced and diced my previous pattern, did some mockups and alterations, and eventually got a much better fit. It could still be improved, but the fit now is astronomically better.
Before I started sewing, I did a bit more research, consulting Linda Baumgarten’sCostume Close-Up and Norah Waugh’s The Cut of Men’s Clothes. Waugh includes an excerpt from a 1769 article on tailoring written for an encyclopedia which I found particularly helpful. At the Jane Austen Festival, I received advice from Zach of Pinsent Tailoring and Hannah of Fabric and Fiction regarding collar patterning, construction, and pad-stitching. Their advice proved to be infinitely helpful because my biggest complaint on my first coat was the way the collar did not stand up; therefore, many thanks to them.
Once I had done some research, my first step was to line the back panels of the coat. My first coat had not had the vent that most 18th century coats had, so I was determined to change that this time. I lined each panel individually, and then I sewed them together. I basted the back together so that I could fit it more easily later.
Exterior of ventInterior of vent
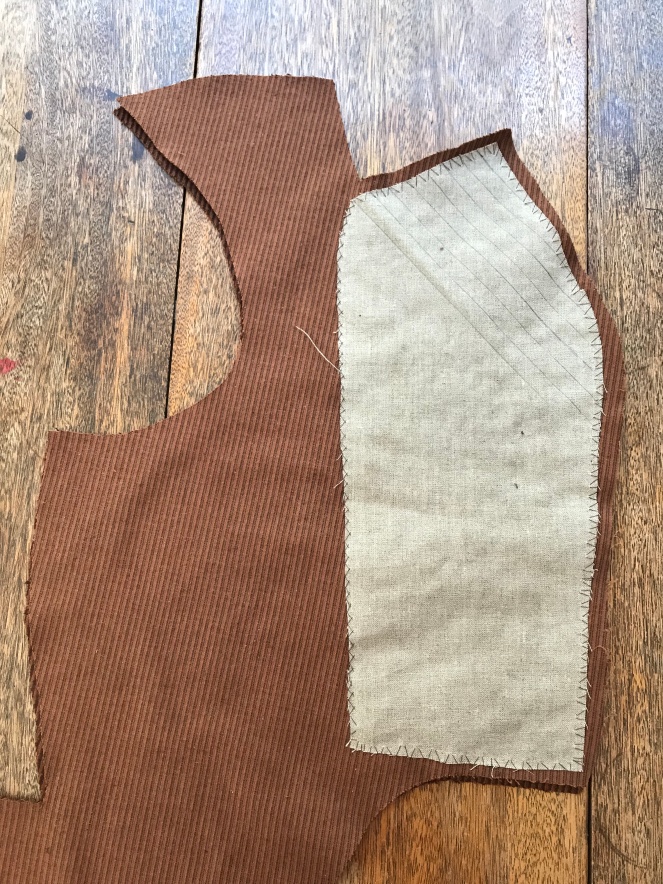
Next, I prepped the front panels. I made buckram with gum tragacanth and B&T’s Osnabrig linen and catch stitched the buckram to the fronts (the lapels and the place that would eventually support the buttons and buttonholes). The lapel portion was pad stitched to make it curve outwards.
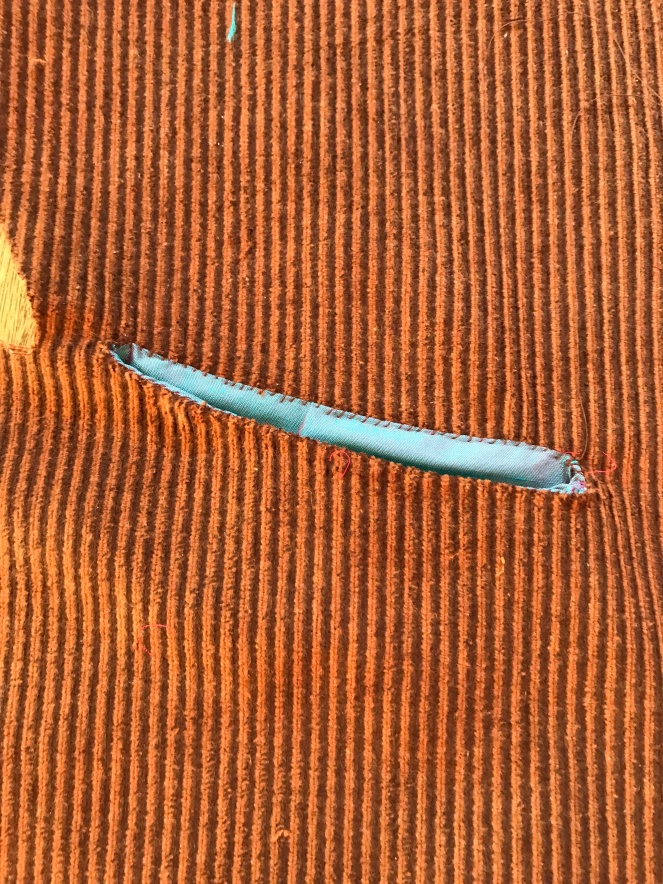
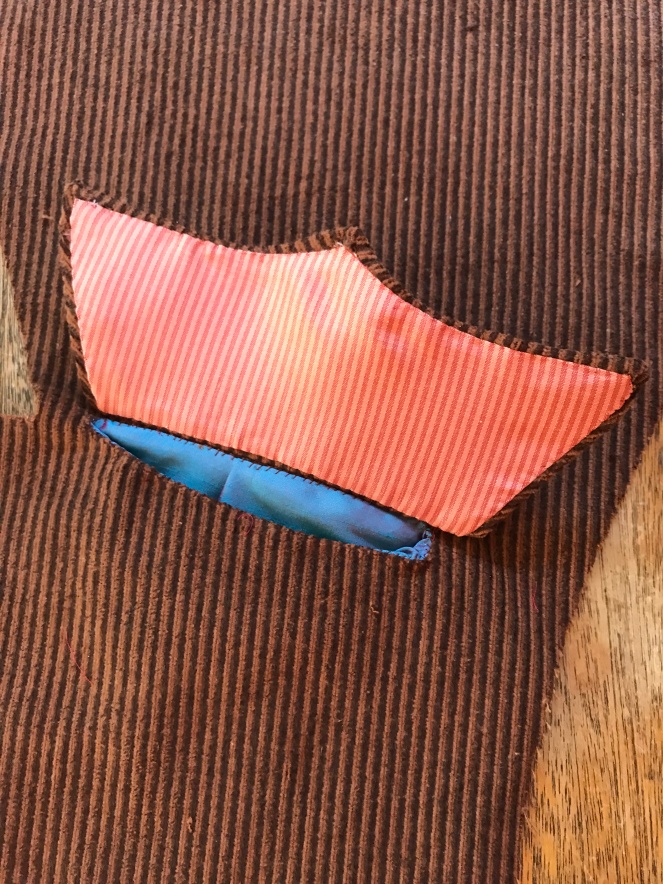
Then, I added pockets. The pocket bags were sewn from scraps of silk and cotton and inserted in slits in the front of the coat. The pockets are quite roomy, which is always a bonus.
I then made the pocket flaps by stitching corduroy to buckram in the proper shape. A fun lining, made from scraps of my first coat, was then tacked in as an homage to my first interpretation of this coat.
A very snazzy pocket
Once I had finished the front panels of the coat, I faced them with cotton corduroy from the lapel all the way around to what would become the waist pleat. I did this with whip stitches.
Next, I began work on the sleeves. These were constructed in the manner detailed here, but I left the sleeve slit open for my eventual cuffs (which I did last).
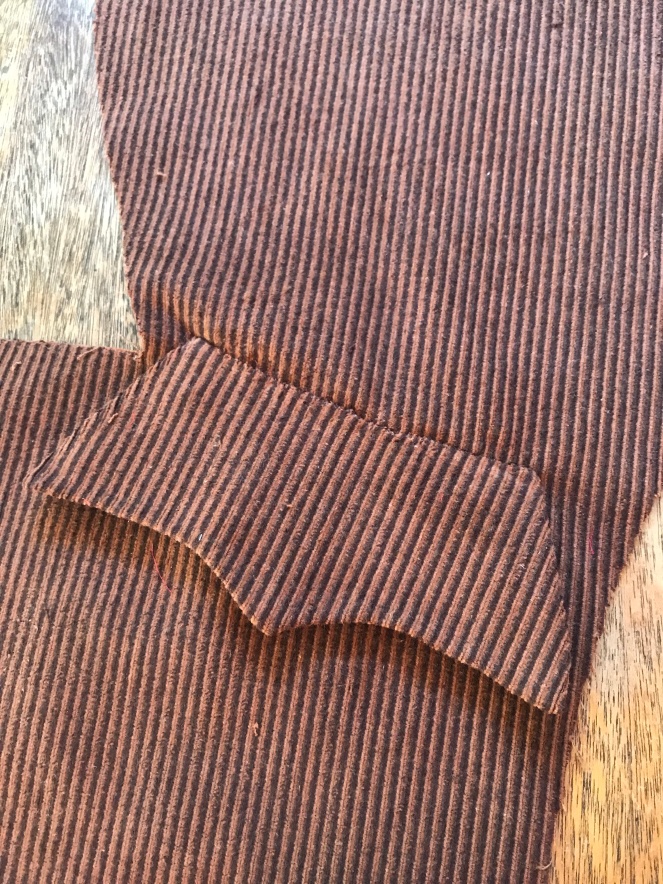
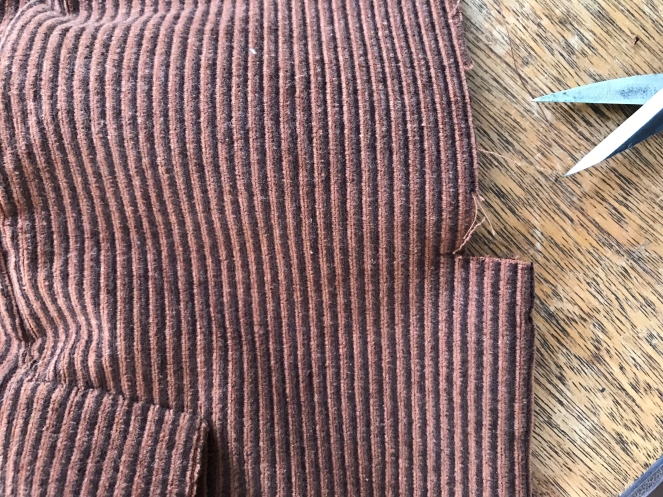
Then, I sewed the fronts of the coat to the back of the coat. I made a small slit at the waist of the back of the coat and turned under that seam allowance. Then, I pinned my turned-under seam allowances to the sides of the front of the coat, essentially creating a lapped seam.
About to be snippedPinned in place
Then I sewed the shoulder seams of the coat, so I essentially had a long vest with four long “tails,” because the front “tails” were not yet tacked to the back “tails”. Next, I pinned in my sleeves and checked their fit. To make them fit the armscyes without pleats, I had to cut off part of the sleeve head, but they still fit.
The excess trimmed from my sleeve heads
I think that next time, I’ll make a duct tape model of myself on which to fit my coat, because tailoring requires so much pinning and fitting to the body (this seems like it should have been obvious to me but it wasn’t). Fitting sleeves would be much easier on a model, but I digress.
Once I had a constructed coat, I pleated and tacked the side seams. In the late 1780s coat in Costume Close-Up, the pleats at the side aren’t fully stitched down, but instead tacked in place with a few thread bars. I tacked my pleats in place in a similar manner, though I think that next time, my thread bars should be longer. I also added a button at the top of the pleat (for reinforcement) and at the bottom of the pleat (also for reinforcement). The buttons are the flat brass buttons from Burnley and Trowbridge that I originally featured on my first coat and promptly cut off as soon as I realized that I would remake that coat.
This was taken after the coat was finished, but it shows the pleats at the sides well.
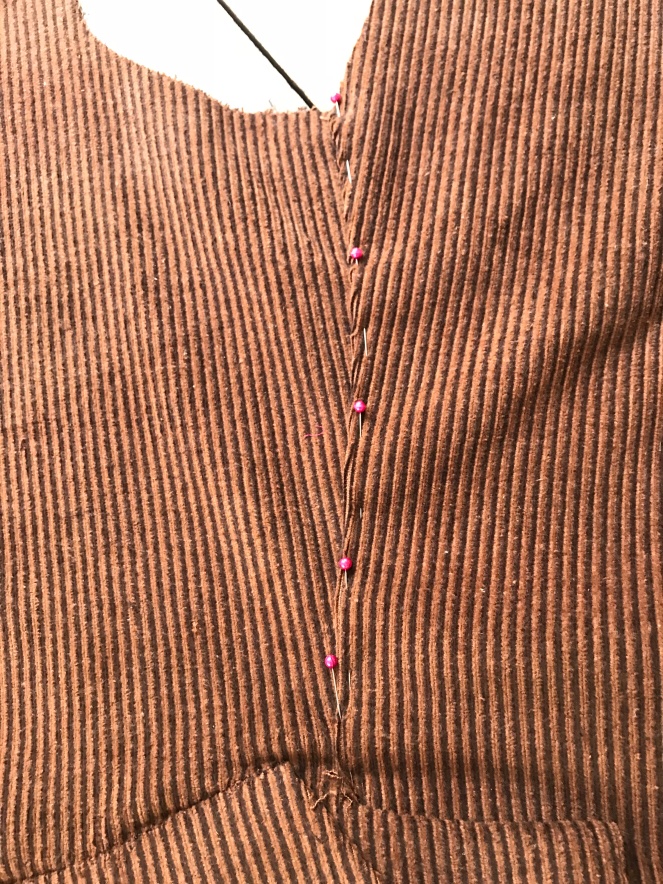
At this point, I also finalized the back seam by pinning it so that it fit well across the back and replacing my basting with back stitches. This is another area where a mannequin would have been helpful, because my back seam is very curved, which causes the fabric to wrinkle.
Then, I began the collar, with no small amount of nervousness. My first collar had been a disaster, and I wanted this collar to work out. I followed Zach of Pinsent Tailoring’s advice and made the bottom seam (where it attaches to the neck) of the collar curved, which was actually what I did on my redingote as well, I now realize. I also used three layers of buckram in the collar stand, per his advice.
First, I catch stitched the buckram layers to the individual collar pieces.
As you can see in the above picture, the neck edge curves down from the center back of the collar (on the right in this picture). The additional layers of buckram in the collar stand were placed under the single layer of buckram lining the entire collar. Apparently, its often unnecessary to add a buckram interlining to the collar fall, but the lack of crispness of the cotton corduroy made it necessary for this collar fall to be lined in a single layer of buckram.
Once the buckram was catch stitched to the collar, I pad stitched only the collar stand so that it curved inwards, like a collar should. Once both collar pieces were pad stitched, I turned in their seam allowances and then tacked a layer of cotton corduroy to the buckram, covering all raw edges. The collar at this point was in two pieces: the left side and the right side. Both pieces had no raw edges except for the neck edge. These then had to be sewn together at the center back. I could have sworn that I had a picture of this process, but apparently I do not. I’ll try to document it better on my next coat.
Next, I attached the collar to the coat. This was a pretty simple process, and I once more neglected to take pictures. I then had to line the coat, to hide the raw edges from the collar edge and the facings. This was incredibly fiddly and took far longer than it should have, so my stitches weren’t as nice and neat as I’d have liked. I also had to piece in a bit of lining because my lining did not cover all of the raw edges.
In the example in Costume Close-Up, the seam allowances of the sleeve heads and armscyes are hidden by the lining, but I was unable to do this on my coat. Hopefully I’ll be able to do so next time.
At this point, all that was necessary was for me to finish my cuffs and add buttons and buttonholes. Thanks to Bernadette Banner’s fabulous video about hand-worked buttonholes, I was able to make mine look good! Seriously, if you want to hand sew nice-looking buttonholes, check out her channel. Actually, check out her channel regardless of your buttonhole ability, because her channel is fabulous.
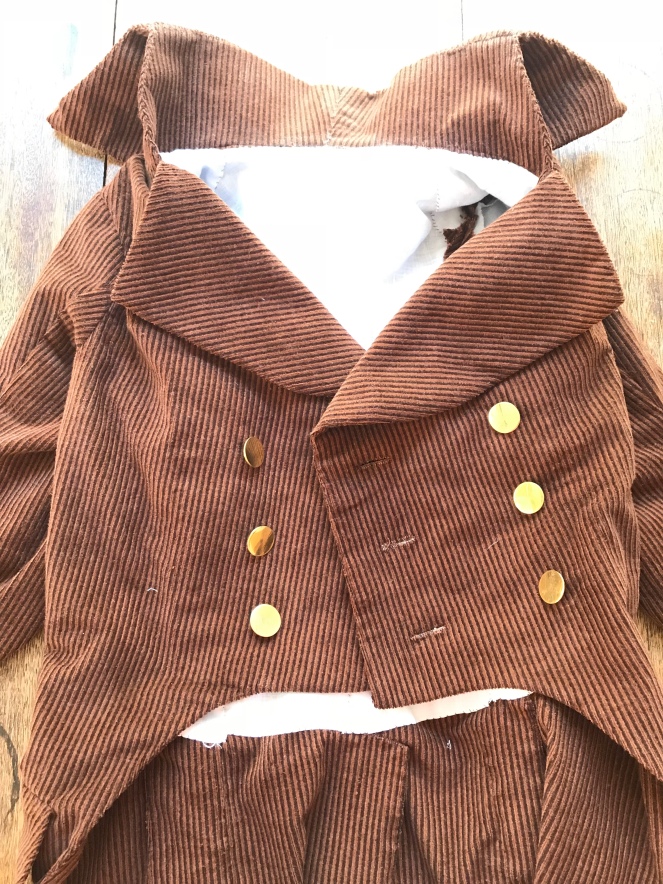
First, I added three buttonholes to the front of the coat, and then placed buttons for these buttonholes on the other coat front. The double breasted appearance of the coat was created by my adding three non-functional buttons on the other side of the buttonholes.
Next, I made my cuffs. These have lined packets to support the buttonholes, made from corduroy, buckram, and lined in silk taffeta.
I sewed three buttonholes in each placket and then stitched them on to the ends of the sleeves, overlapped slightly by my decorative cuff. Buttons were then added, and the coat was finally finished.
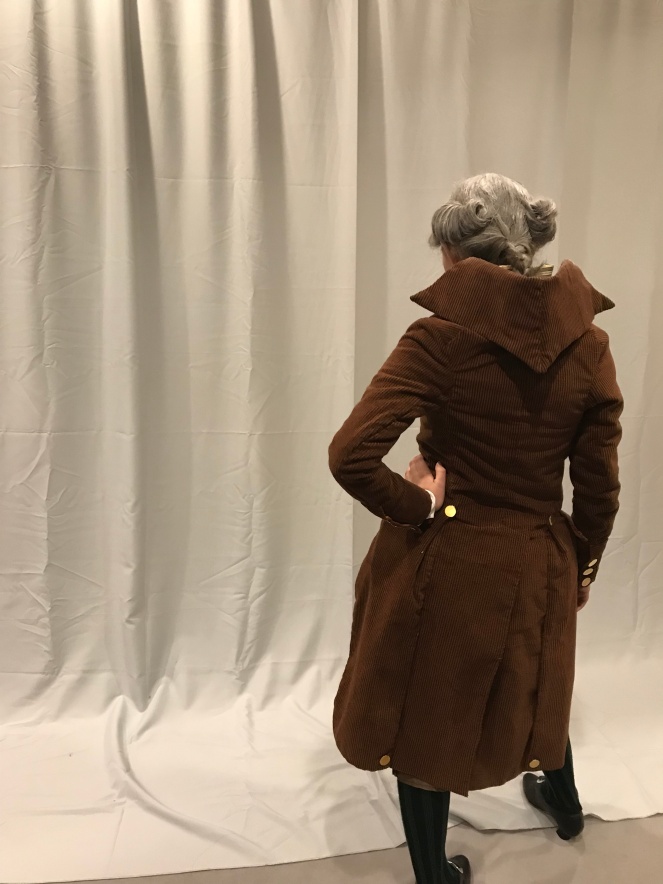
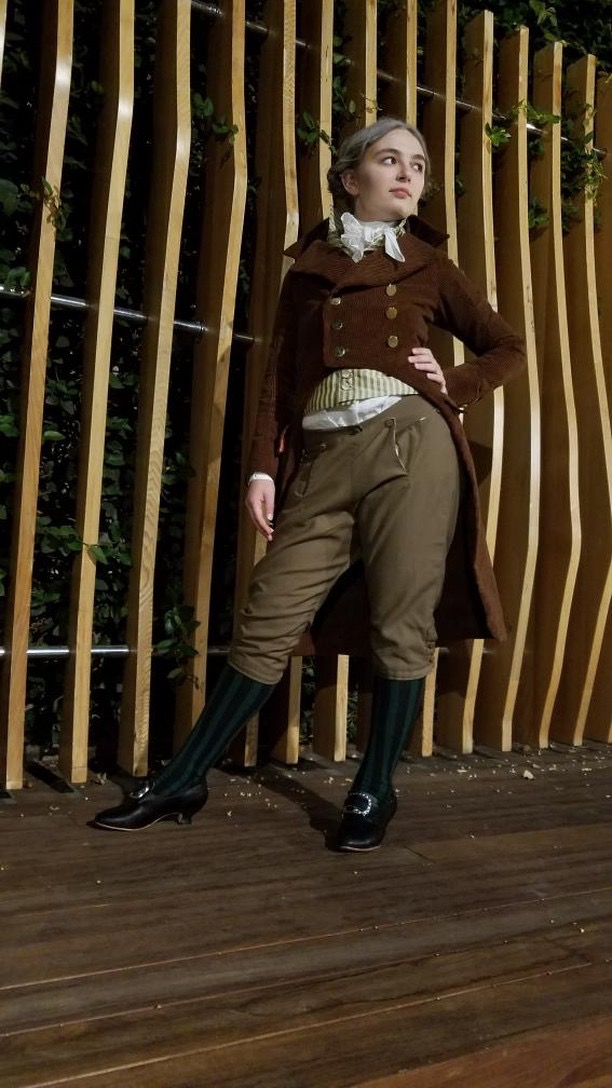
The only pictures I have of this coat on me are from Costume College, taken at night, and lit horribly, so my apologies. Hopefully, I’ll take proper photos of this coat soon!
Such a bad angle and weird pose, sorry!A shirt visible below my waistcoat! What a faux pas! I clearly needed to pull down my waistcoat before taking this!
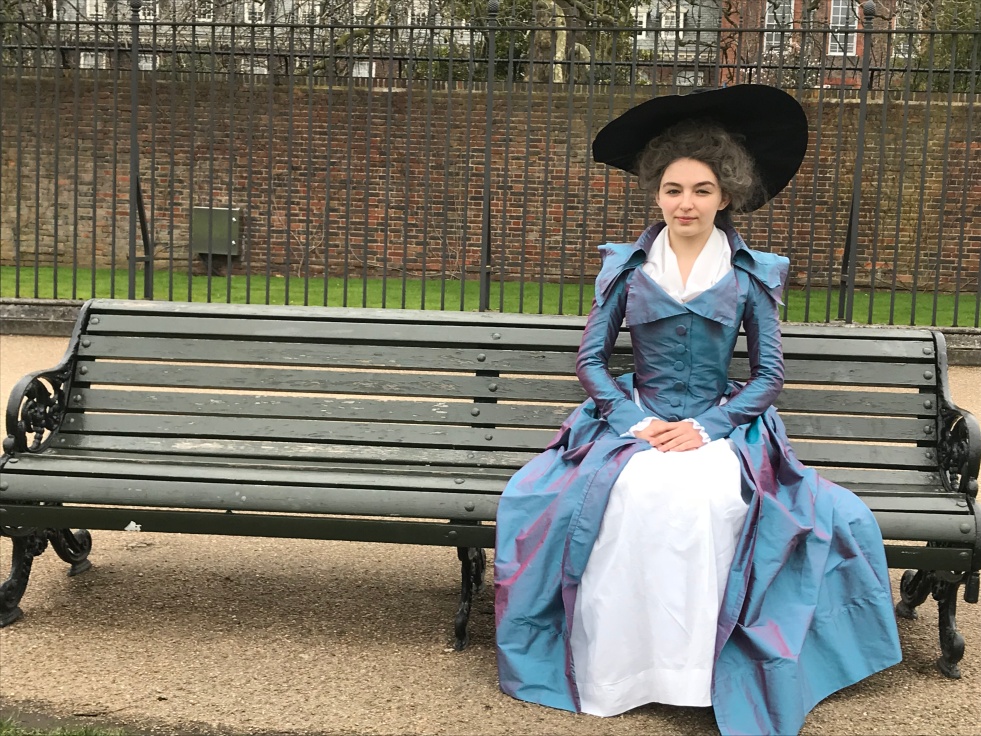
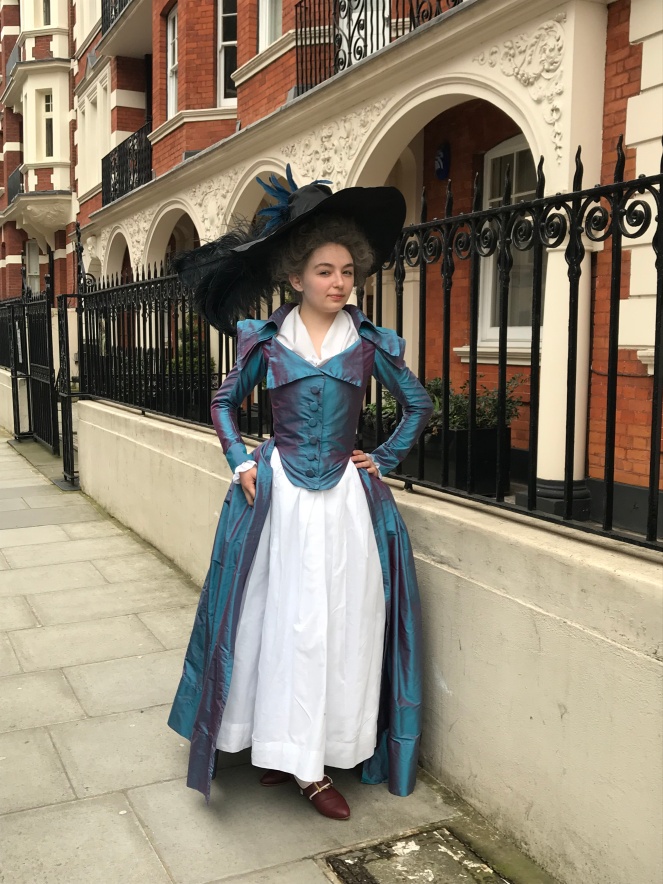
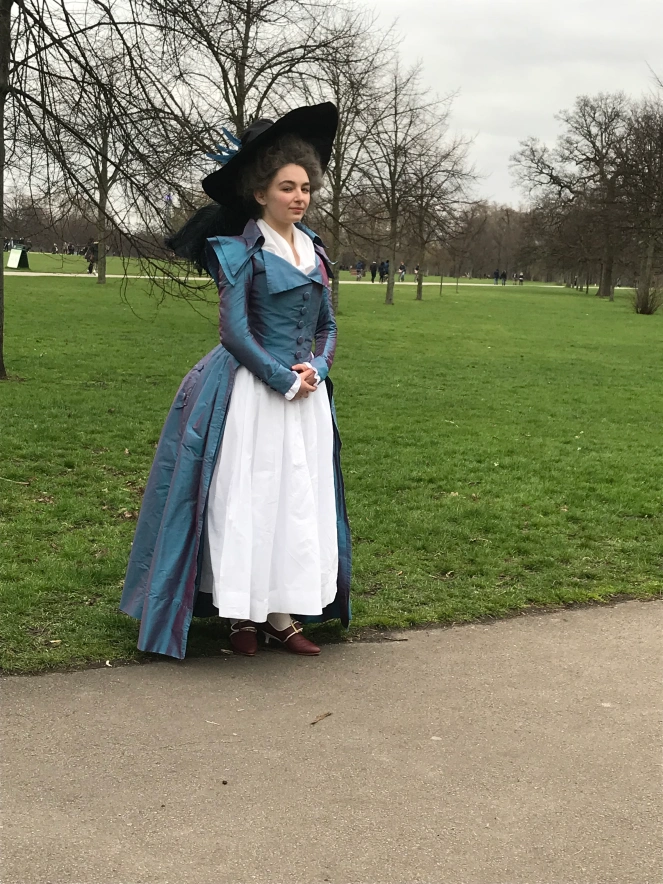
If you’ve been reading my blog, you’ll know that I recently undertook the making of a 1790s redingote inspired by the famous example held in the collections of the Los Angeles County Museum of Art. If you aren’t familiar with this project, I suggest you look here (part one), here (part two), here (part three), or here (part four). What you may not know is that I visited London over spring break, so I was lucky enough to be able to take pictures of my completed redingote and go to tea while wearing it! Most of the pictures were taken in Kensington Gardens.
I chose to style it with my Gainsborough-inspired hat that I made for Costume College 2017, a neckerchief, and several fluffy petticoats. I attempted and (mostly) succeeded in putting my hair in a “hedgehog,” which was an experience to brush out afterwards, but looked fabulous with the dress.
Without further ado, here are the pictures:
A Georgian adjusting her garter (ignore the unfortunately placed water on the sidewalk)
Now for some detail shots!
I’d like to thank my mother for taking these photos and the Los Angeles County Museum of Art for making a pdf pattern from the original of this dress!
I’m finally writing the last blog post about the construction of this dress! It’s been a journey…
This post will be a little bit all over the place due to the chaotic nature of finishing up dresses, so hopefully, a little organization will help make this clearer. The things of note still to be discussed are as follows (in this order):
Lapels
Capes
Collar
Buttons
The lapels:
I’m kind of atrocious at remembering to take photos as I sew, but hopefully these will be self-explanatory! I simply whip stitched the triangles of fabric on to the finished lapels.
The capes:
These were also pretty simple – I merely recreated the pattern from the original at LACMA, to the proper measurements. I made an upper cape and a lower cape (the lower being the slightly larger of the two), hemmed them, attached them at the neckline, and called it good.
The collar:
This portion is far less self-explanatory. If you remember my Maximilien Robespierre frock coat, you’ll know that one of the major problems with that garment was the tendency of the collar to collapse completely. This time, I combatted that by mocking up the collar ten million times and by making the collar stand much shorter. I also made the collar stand somewhat oddly shaped, because the lapels of the dress didn’t go up as high on the neckline as I would have liked them, but I think that this aided in supporting the collar.
Once I’d patterned the collar, I cut it out from linen buckram without seam allowances and from the silk with seam allowances. Then, I used what I think is called a catch stitch to attach the linen buckram pieces to the silk, as seen above.
Once the linen was attached to the silk, I pad stitched the linen buckram so that the collar had a slight curve. I then did the same thing for the collar fall, though I used far fewer pad stitches because the collar fall didn’t need as much support as the collar stand. I did, however, stitch a small fold in the collar fall, right along the upper edge.
Moving back to the collar stand, I stitched the two pieces together and checked it against my dress form to ensure fit.
Then, it was time for the difficult part. With the crease in the top of the collar fall, I layered the collar fall over the collar stand so that there was about a half an inch of overlapping linen buckram. I then stitched these together, so that I had a functional collar stand and collar fall that stayed together and in their shape. If I use this technique again, I’ll try to document it better. At this point, I covered the exposed linen buckram in silk, finished all the edges, and sewed the collar to the gown.
The buttons:
I made the buttons myself, by covering molds with circles of wool felt and then circles of silk. What did I use for molds, you may ask? Because I wanted a uniform size, I used quarters. With 18 buttons on the gown, that’s a total of $4.50 in buttons. I hope that this doesn’t count as defacement of currency…
I also made fake button plackets for the back of the skirts, like those on the original at LACMA. I cut a shape similar to that of those on the original, and I sewed around them, turning them inside-in, and ironing in the raw edges. I then whip stitched these on to the skirts.
My final thing to do was to sew on the buttons at the cuffs, center front, and back “pocket flaps.”
With that done, the dress was complete! Before taking pictures, I also made two simple white petticoats, one in cotton organdy and one in linen, but those are rather uninteresting apart from the fact that they, like the redingote, were entirely hand sewn.
I’ll try to have a post with all the pictures of the completed gown up soon! Thank you for reading!
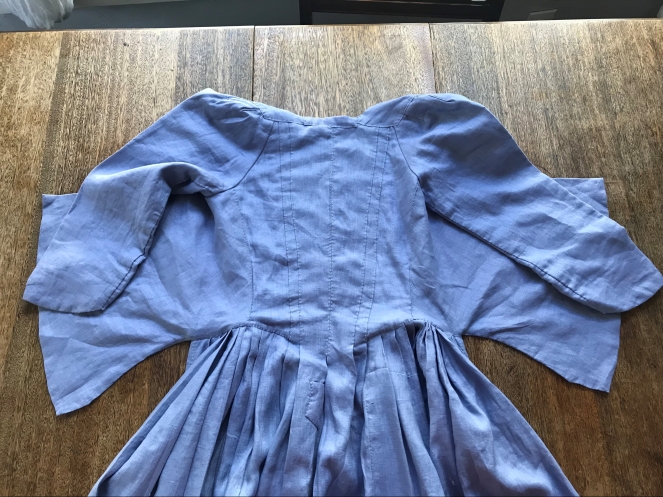
When I last left off on this project (see here), the sleeves were completed but not attached. Therefore, the next thing I did was attach the sleeves.
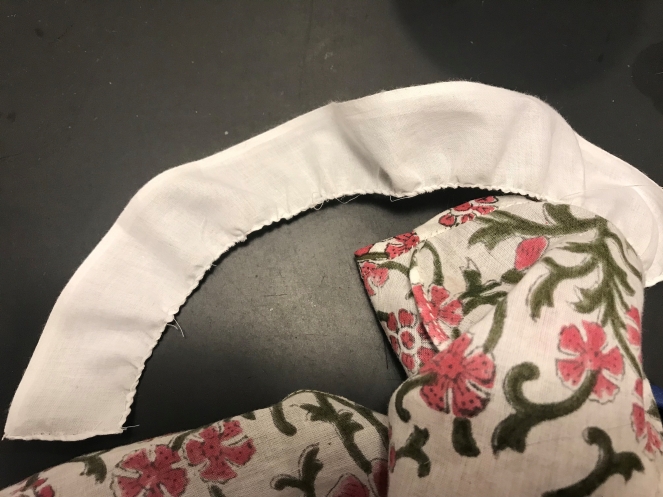
I basted the sleeves in place to check for fit, and once I was satisfied, I stitched the under side of the sleeve to the armscyes using backstitches. Then, it was time for the difficult part: fitting the shoulder strap of the sleeve. Based on the original at LACMA, the shoulder straps were cut in one with the bodice. Therefore, I had to stitch the top of the shoulder strap in a way that would hide raw edges all around. I don’t have any pictures, but believe me when I say that it was very fiddly. However, I accomplished my goal, and I managed to finish the neckline all around, including the pieced bit that I had added at the back of the shoulder.
At this point, it was time to move on to the skirts. First, I hemmed the front of my skirt panels. The other side was on the finished selvage edge, so I didn’t bother finishing the side seams of the skirt as I attached the skirt fronts to the skirt back (which was cut in one with the back bodice).
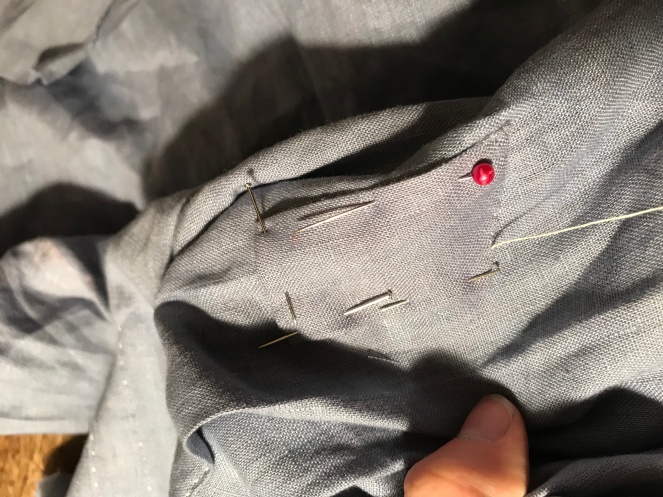
Then, I pleated and attached the skirts. I had been dreading this, because I found pleating skirts cut in one with the back to be very difficult the last time I did this, on my Maureen gown. However, it was less terrible than I had been expecting.
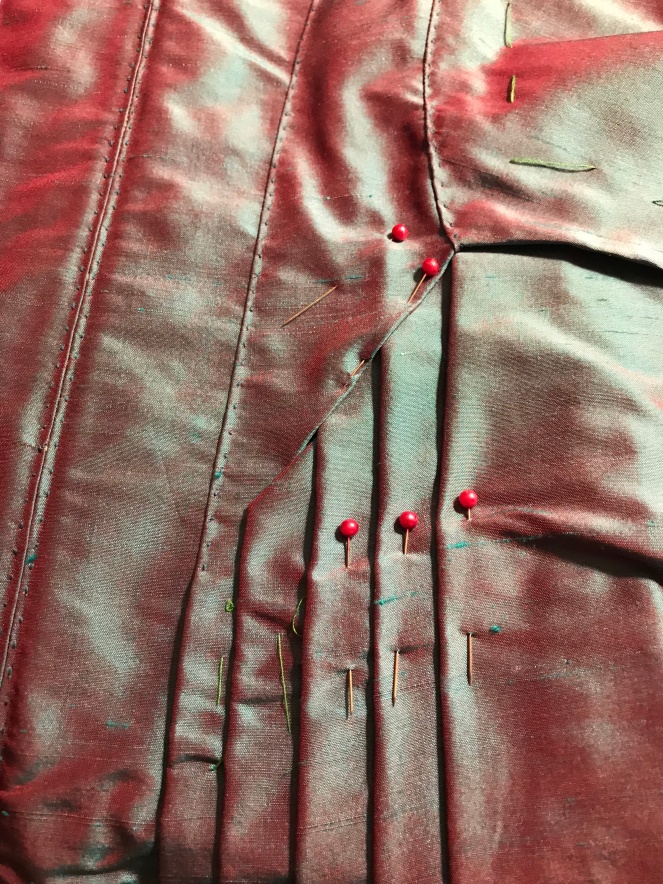
To do this, I first snipped the skirt from the bodice until they were only attached near the side back seams. Then, I pleated the back panel of the skirt until the pleats were even and used an even amount of fabric. I then realized that my pleats had to move with the curve of the back of the dress, so I moved them so that they were staggered upwards, like a staircase.
After I was satisfied with the pleats, I turned under the lower edge of the bodice. To get the pleats to lay smoothly, I folded under the first of the pleats so that it lay over the bodice, but I tucked the rest under the folded lower edge of the bodice. Hopefully, the above picture explains this better than I do.
I then used neat whip stitches to secure the pleats. I also pleated the fronts of the skirt so that they were even, and I finished the inside of the skirts to the best of my ability.
At this point, I hemmed the dress, and the base dress was completed. Next time, I’ll discuss my construction of the collar, the capes, the buttons, and the lapels, so keep an eye out!
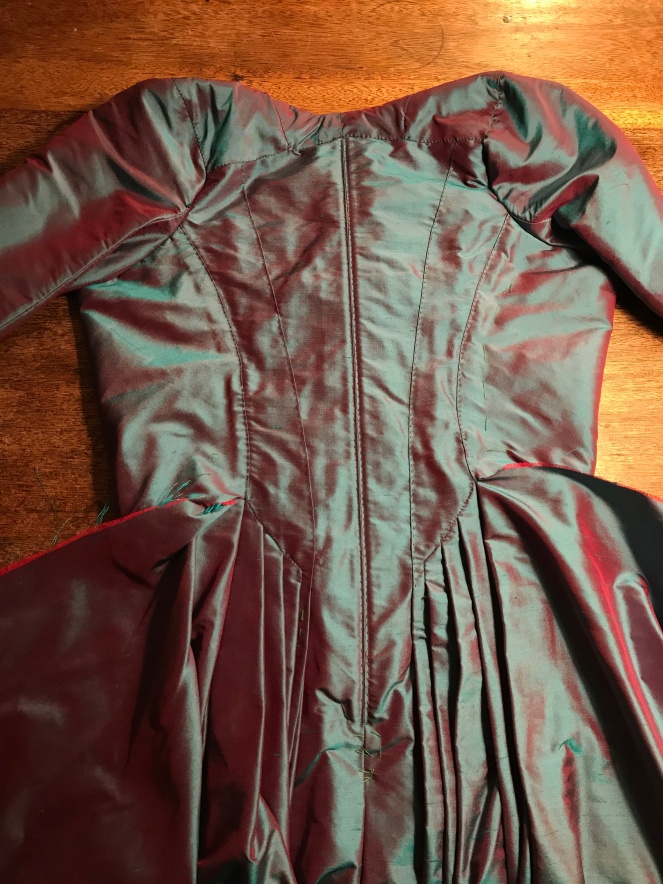
When I last wrote about this gown, it hardly looked like a gown yet. The base components were there (the bodice lining, the pleated back), but it still had a long way to go.
Ready for the ball!
Once it was at this stage, I basted the silk fashion fabric to the fronts, which was a bit of a feat because it was so fiddly (the shape was somewhat odd). I used prick stitches to finish the side seam of the bodice and attach the silk. I then finished the front edge and part of the bottom, but I left the silk basted in place and turned my attention to the sleeves.
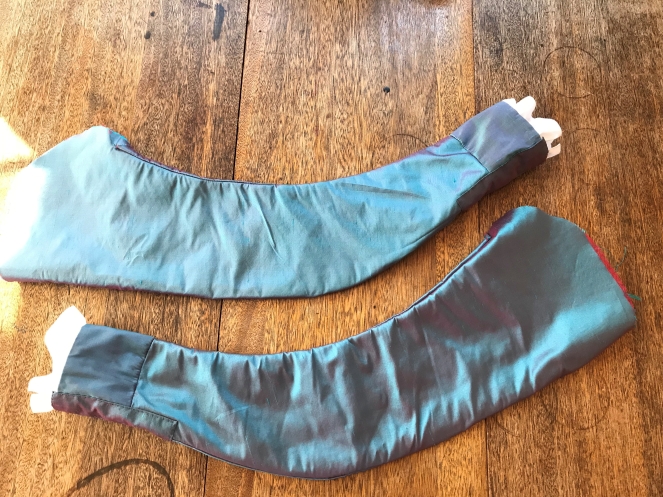
The sleeves are a two-piece bent sleeve shape, like those seen on the original. I cut these out of linen lining and silk fashion fabric and first I sewed the seam on the outside of the sleeve (the seam that touched my elbow, not the inside of my arm).
This is the linen lining of the sleeve. You can see the first seam I did on the outside.
At this point, with two sleeve linings and two sleeve fashion fabrics, I had four unfinished sleeves. I decided to complete the sleeves using the “magic” lining method, because it’s much faster. To do this, I layered the sleeves on top of each other with under sleeve of the lining touching the under sleeve of the silk. I then used a strong backstitch and sewed the inside seam of the sleeve through all four layers. Then, the sleeve was turned so that it was right-side-out, and I had a completed sleeve. This was repeated for the other sleeve, too.
The sleeves were layered together……then the inside seam was pinned and sewn.
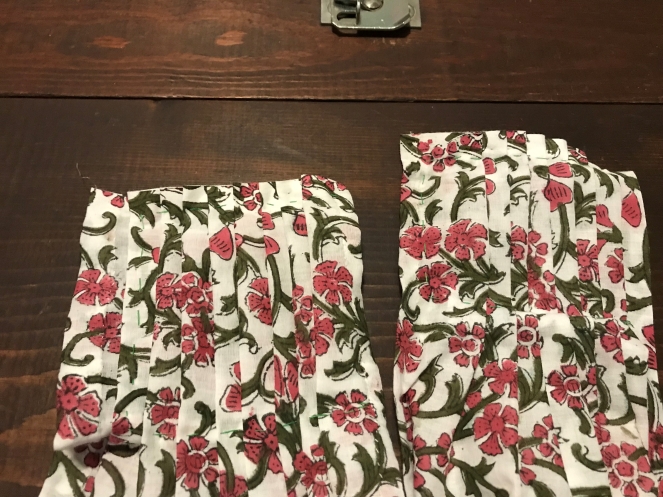
Once the sleeves were constructed, it was time to make the cuffs. I did this by covering four rectangles of linen buckram (made by coating linen in gum tragacanth) in silk: two for the actual cuffs, and two for false button plackets. I chose to do a false button placket because it is far easier and I have small enough hands that I don’t need to unbutton a cuff to fit my hands through it. I think that I have seen non-functional button plackets on extant gowns and in fashion plates, so hopefully this feature is accurate.
The silk covering the rectangles of linen was basted in place.
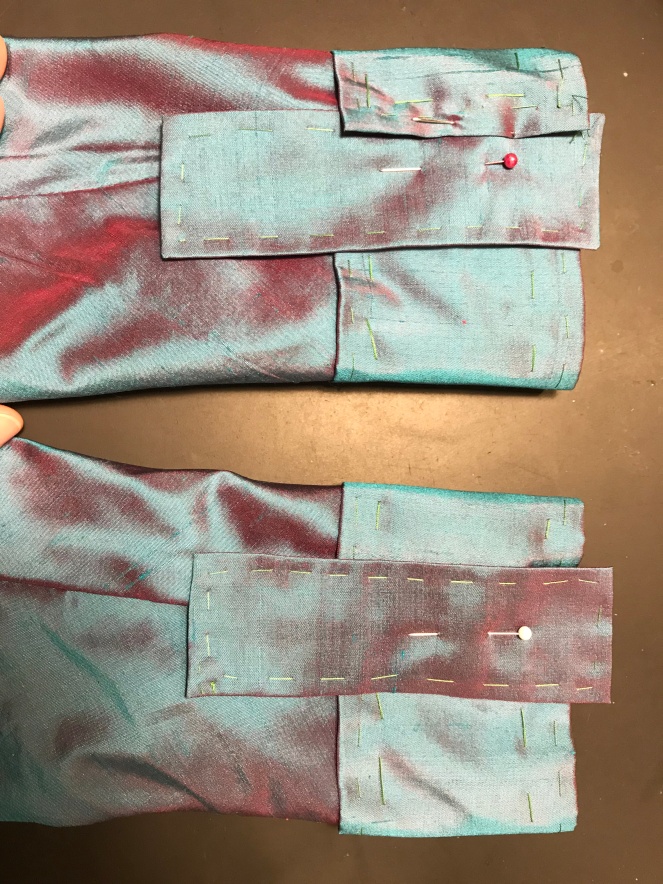
The cuffs were then sewn in place with whip stitches, and I added the button plackets with spaced backstitches.
I chose to attach the button placket in the way shown in the bottom of this picture.
Once the cuffs and button plackets were attached, I used a bit of cotton voile to make a cuff ruffle, and I whipped it in. At this point, the sleeves were completely finished and ready to be attached!
I’m going to end this post here, but keep an eye out for the part three of the construction of this gown!
So, somewhat ironically, I actually managed to get pictures of the finished gown before writing about it here, but the draft for part one of the construction was already saved to my WordPress account. Because of this, I will be blogging about the construction of my redingote for the next few posts, so stay tuned!
As I discussed in my recent post about my plans for 2018, I’ve been wanting to make a redingote based on the one housed at LACMA for a while. I already had the fabric from when I went shopping in the New York City garment district, and luckily for me, the Los Angeles County Museum of Art recently released PDF gridded patterns of some of their most famous pieces, and the redingote about which I’d been dreaming was among them!
I drafted the pattern in mid-February and was able to complete a complex gown and two matching petticoats, all entirely by hand, before the end of March, which I consider to be a massive success. I was lucky in that my first mockup fit almost perfectly. I ended up using the pattern from my floral dress (see here and here) as a rough base, which helped a lot with the fit.
Once I had a mockup, I started sewing. This involved a lot of guesswork, but I was aided once again from LACMA because their gridded PDF patterns have construction notes. One thing that was interesting about the gown off of which I based my redingote was that it has a under bodice that laces closed. I quite liked this idea, so I decided to do this too.
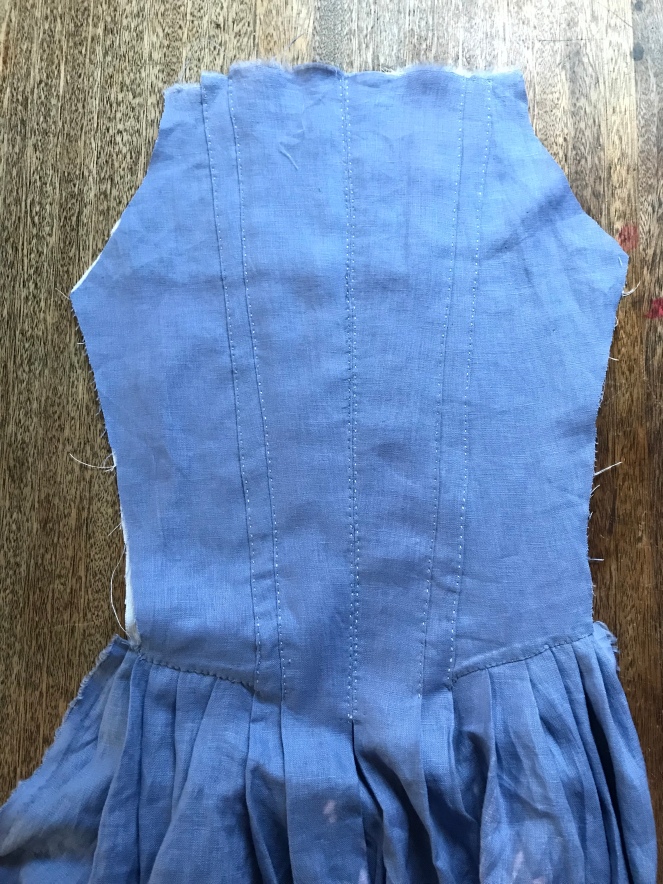
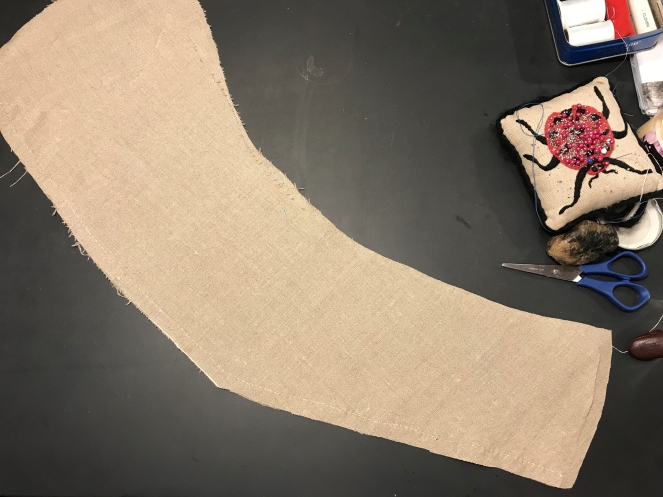
The back lining
The first thing I did was put together the back lining. This had two boning channels that are accessed through eyelets (they’re on the other side of the fabric in the above picture).
Next, I attached the front outer lining (the one to which the fashion fabric was eventually attached).
The front inner lining with eyelets
After the front outer lining was attached, I made the front inner lining by sewing a boning channel and six eyelets in each side. This was pinned in place, hemmed where necessary to make a clean finish, and attached to the lining at the side seam. I attached this in a way that makes it so that when the dress is laying flat open, the inside looks clean: the hems on the inner lining were turned away from the body, if that makes sense.
After the lining was put together, I realized that I had made a mistake when drafting the pattern. I realized that the neckline in the back of the dress was too low and too squared to support a curved collar, so I had to piece in a bit to raise the back of the neckline. However, piecing is period, and I really like how authentic it makes this redingote feel.
The weird pieces sticking out at the top corners (near the tops of the shoulder straps) are the added pieces.
Once the possible catastrophe of a too-low back neckline was averted, I basted down the inner lining so it wouldn’t flop around. At this point, it was time to add the silk. The original off of which I based my redingote had a back cut in one with the skirts, which I decided to do too, even though it can be difficult and time consuming. When I was cutting out the silk, I cut out the back skirts with the back bodice attached. However, I split the back bodice into two parts, like in the original, and I spaced them several inches apart so that I would have extra fabric to pleat into the skirts.
The pieces at either side of this picture, flopping around, are the other parts of the back of the bodice.
First, I used spaced back stitches to attach the back bodice silk at the center back, carefully avoiding the reed bones at the back. There had been extra silk between the two pieces, which was pleated at the center back (that’s where one can see the pleat at the bottom center of the above picture).
Next, I pinned the side back bodice silk so that the entire back of the bodice lining was covered in silk. I then sewed it on using spaced back stitches. After the silk at the back of the gown was attached, I sewed the shoulder straps to the back.
This was the front of the dress at this stage in construction.
I’m going to cut this post off here; thank you for reading! I will try to have the second part of my redingote saga posted soon.
Soon after I finished the bodice of my floral 18th century “Italian gown” (see here), I added a skirt and trim, and the dress was completed. I’ve heard that these dresses go together quickly, and that is no lie. I think I could make one in two or three days now that I’ve worked out the techniques.
As I said in my previous post, I used techniques described in the American Duchess Guide to aid in the construction of this dress. The mantua-maker’s seam was new to me, and I quite like it (I used it for the skirt seams and the sleeve seams). If you want to learn about 18th century dressmaking, get their book. It’s the best.
With those two points made, it’s onto construction.
I had four skirt panels, each the legnth of the selvage width. This fabric had a border print at the bottom two inches or so, but I hid that in the hem, and the undecorated selvage edge became the top of the skirt. I hemmed the edge of the panels that was to become the skirt fronts.
I seamed the panels together with mantua-maker’s seams at the sides and a normal seam at the back. The side seams of the skirt also had the pocket slits, which hemmed. I then pinned and basted pleats in each side of the skirt to fit to the bodice.
Then, I pinned the skirts to my dress form until the hem was even. Once it was even, I attached the skirts to the bodice with small whip stitches.
The pleated top of the skirt naturally folds over, which is something often seen in extant skirts as well.
After the skirts were attached, I hemmed the gown, and then it was structurally done.
However, it was yet untrimmed, which for the 18th century generally means nowhere near complete.
I did a bit of research, because I simply couldn’t decide upon trimmings that would compliment this dress. I again turned to the American Duchess Guide and I followed their lead and decided to leave the dress itself relatively untrimmed, so that I could make millinery with which to trim it later. I decided to include neck and cuff ruffles, however, in case I don’t want to wear a neckerchief.
The neck and cuff ruffles were made with the selvage edge (no roll hemming! yay!) of some cotton voile. I used whipped gathers to fit the ruffle to the neckline and cuff, respectively.
The ruffle was not as densely gathered as I would have liked, but I still think it’s elegant and pretty.
Once I had added the neck and cuff ruffles, all I had to do was add some ties in the skirt so that I can tie it up, as was popular in the last quarter of the 18th century.
I think I’ll wear it almost exclusively with the skirts tied up like this; I find the effect very aesthetically pleasing.
No guts no glory
All in all, I’m quite pleased with this dress, and I look forward to making some millinery with which to decorate it!
If you are at all familiar with 18th century dressmaking, you’ve probably heard of The American Duchess Guide to 18th Century Dressmaking, by Lauren Stowell and Abby Cox. In the fourth chapter of their magnificent compendium, they describe the construction of the “Italian gown” of the late 1770s through the 1790s. I had attempted to make one of these with my Duvet Cover Dress (here, here, and here), but I didn’t know as much about construction then as I do now. As such, I have decided to re-attempt making an “Italian gown,” or a late 18th century gown with a closed bodice cut separately from the skirts.
I’d eventually like to attend reenactments, so this dress is meant to be suitable for such events. I’m making it specifically with summer events in mind, so it has long but unlined sleeves to protect my arms from sunburn and to keep them cool at the same time. The fabric is a block-printed cotton similar to those seen in the 18th century that I purchased from Etsy, and it was lined with linen from a shirt from Salvation Army. The small amount of linen for lining was the other reason that the sleeves were unlined. The linen shirt I used was fairly loosely woven, so I had to finish every edge of the bodice before attaching the skirts (which I have yet to do).
This dress is entirely hand sewn using linen thread. I also am using many of the techniques described in The American Duchess Guide to 18th Century Dressmaking, such as the “English stitch,” of which I will definitely make use again in the future.
Anyway, without further ado, the construction:
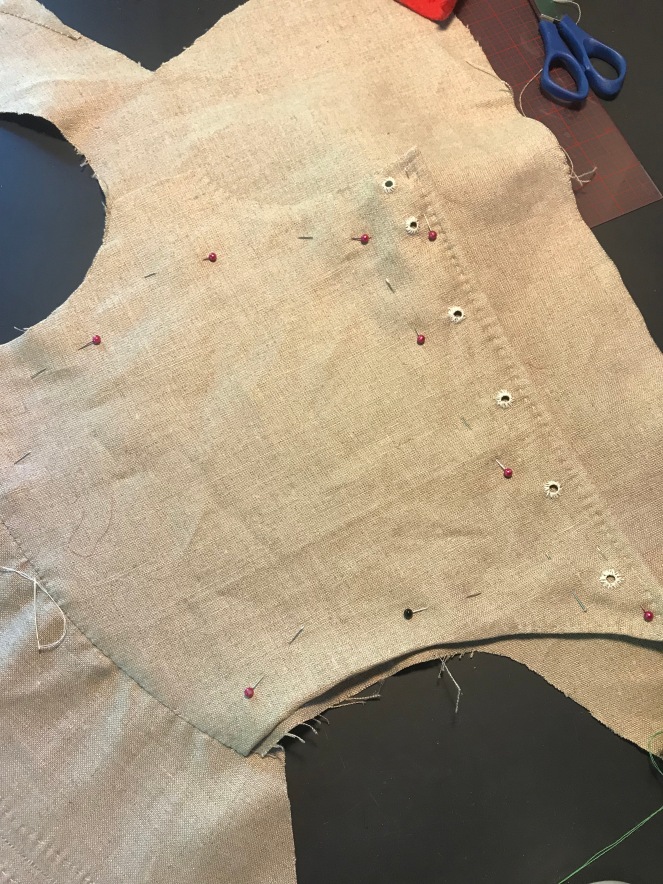
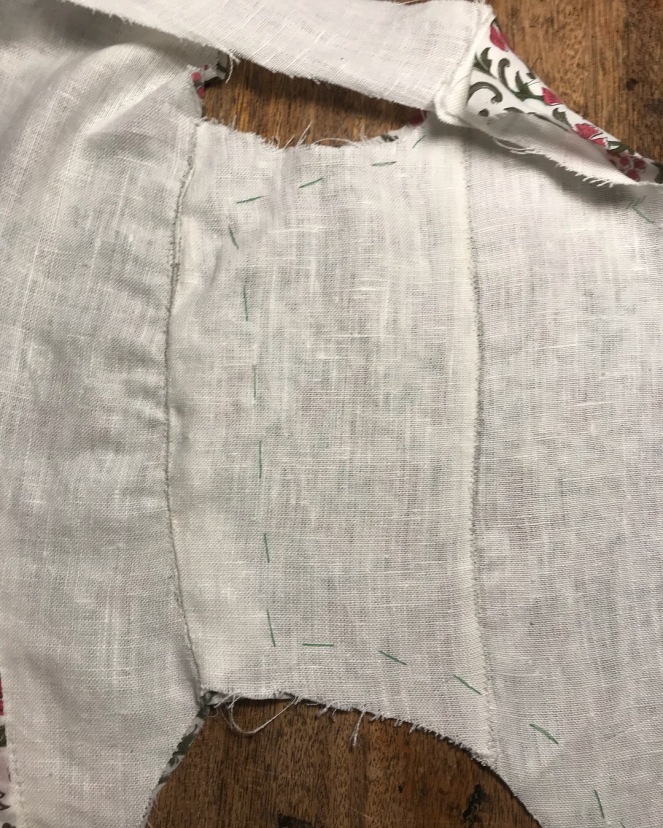
I started by drafting a pattern, using the original pattern from the Maureen gown as a base. I drafted new sleeves (with help from the American Duchess guide, because it’s awesome) that took many mock-ups, but I think I finally have a functional late-18th century two-piece sleeve pattern, which is nice. Once the mock-up was fitted, I cut it out in linen and in cotton. I had to piece the front panel of the lining, but piecing is period!
This was taken at a later point in construction, but the seam on the right is the seam that pieced the bodice lining together.
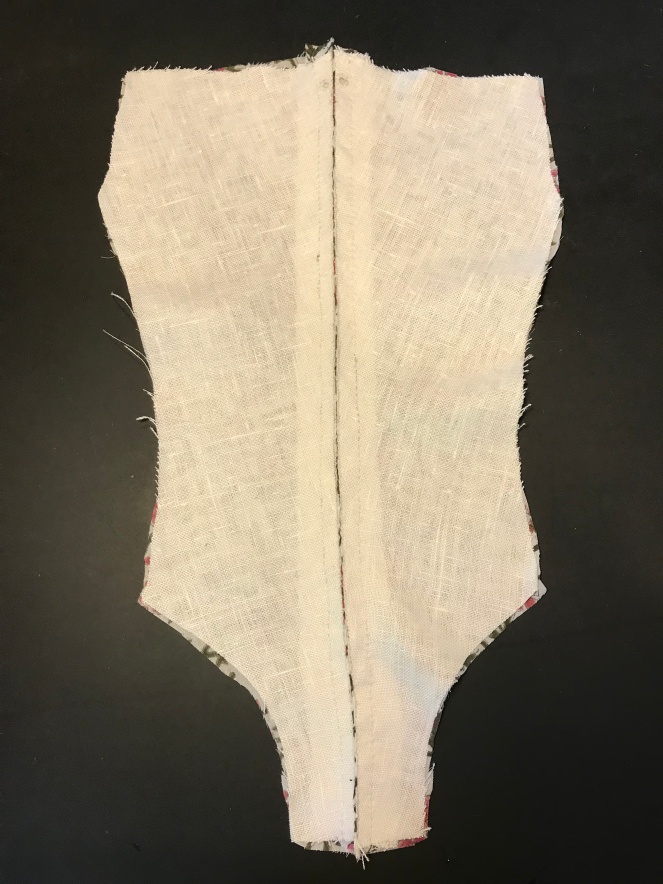
After I had pieced the lining, my first step was to make boning channels at the center back. I made these accessible with an eyelet; should I decide to wash the dress or should a bone break, which may happen, as I am using reed boning rather than zip-ties, I will be able to easily access the reed. I then English stitched the back panels together.
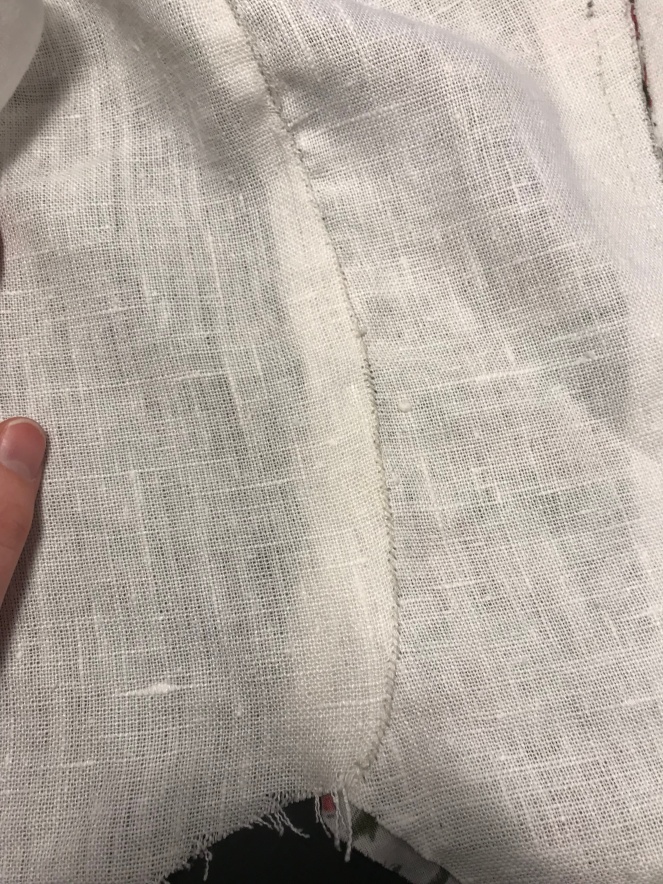
My next step was to attach the lining for the front pieces. I did this by lapping the seams with backstitches for strength. I also added the shoulder straps in this manner. However, when I was fitting the front of the shoulder straps, I realized that the bodice was too loose in the back, so I took in the lining at the seam. I didn’t loose any fabric; instead I just pulled it to the side to tighten the back of the dress. I secured this with whip stitches, and after determining that the fit was now correct, I whipped on the front bodice fashion fabric.
Here you can see the bodice as I attached the front with backstitches.Here you can see how I changed the seam: the more opaque white to the left of the seam was the overlap of the fabric.
Once the bodice front was attached, I did another fitting and closed the front edge of the bodice on each side by attaching the lining and the fashion fabric so as to hide raw edges.
I then had to make the sleeves, the construction of which I did not take any pictures. They were constructed with a mantua-maker’s seam as described in the American Duchess guide because they were unlined and I wanted the interior to be neat. I then set the sleeves in the usual manner.
At this point, the sleeves were attached and the bodice was structurally done, but the shoulder straps had no fashion fabric and were fraying badly, so I hemmed the outer edge underneath the sleeve cap. I then attached the shoulder strap fashion fabric and a scrap of fabric to the top of the back to neaten it. From there, I finished the raw edges of the bodice all the way around by turning the raw edges towards each other, and the bodice was finished.
I hopefully will have an update on this project and others soon, so stay tuned! Thanks for reading!